xively.com feed with Arduino

[Note: xively.com is gone. This system doesn’t work. Post is here for historical reasons only]

Bi-directional communication from Arduino to a xively.com feed using an ethernet shield.

  • Initializes an internet connection (DHCP)
  • Connects to xively.com servers every minute
  • Stores random value in the feed using HTTP PUT
  • Retrieves current feed value using HTTP GET
  • Lights up LED when transmitting
By the way, xively used to be cosm used to be pachube… 
Arduino circuit
  • Use an ethernet shield.
  • Connect ethernet cable. (I am using a Netgear WNCE2001 ethernet to wiFi adapter)
  • LED is connected to pin 5 and ground. The shorter lead connects to ground.

download

[wpdm_file id=18 title=”true” ]

files
  • xively_test1 (Arduino sketch)
Arduino files and libraries

Copy the xively_test1/ folder to Documents/Arduino. This puts it in the Arduino sketchbook.

Notes on installing xively/cosm/pachube libraries for arduino: https://reactivemusic.net/?p=4900

Instructions

  1. Connect Arduino to Macbook via USB.
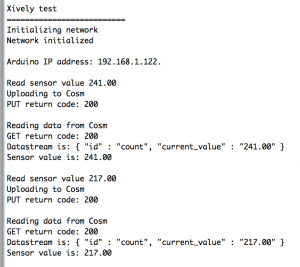
  2. Open the Arduino serial monitor to initialize the ethernet connection and display the IP address.
  3. Every minute data gets send to the feed
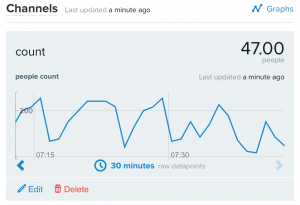
  4. Monitor feed data here: https://xively.com/feeds/98281/workbench
Arduino sketch


/*
5/20/2014 - Arduino/xively feed interaction
Uses Ethernet Shield and and LED connected between pin D5 and ground
Sends a random value to a xively.com feed every minute
The LED lights up during data transmissions
demonstrates:
HTTP PUT - send data to xiveyly feed and store
HTTP GET - read xively feed value
*/
#include <SPI.h>
#include <Ethernet.h>
#include <HttpClient.h>
#include <Cosm.h>
int ledPin = 5;
int upCount = 0; // counters for number of times going up and down
#define API_KEY "96PqSh4rj7HzNif3WtTpN7GjX96SAKxrWms3SUhwaDFGUT0g" // your Cosm API key
#define FEED_ID 98281 // your Cosm feed ID
// MAC address for your Ethernet shield
byte mac[] = { 0x90, 0xA2, 0xDA, 0x0D, 0x0B, 0xCE };
// note that pins 0 and 1 are used by the Ethernet shield
unsigned long lastConnectionTime = 0; // last time we connected to Cosm
const unsigned long connectionInterval = 60000; // delay between connecting to Cosm in milliseconds
// Initialize the Cosm library
// Define the string for our datastream ID
char sensorId[] = "count";
CosmDatastream datastreams[] = {
 CosmDatastream(sensorId, strlen(sensorId), DATASTREAM_FLOAT),
};
// Wrap the datastream into a feed
CosmFeed feed(FEED_ID, datastreams, 1 /* number of datastreams */);
EthernetClient client;
CosmClient cosmclient(client);
void setup() {

 // initialize the detector pins 

 pinMode(ledPin, OUTPUT ); // internet transmitting indicator
 // start the Monitor (console) serial port

 Serial.begin(9600);
// display happy messages 

 Serial.println("Xively test");
 Serial.println("==========================");
// Keep trying to initialize the Internet connection
 // Note - we should eventually timeout of this and just run the stairs independently

 Serial.println("Initializing network");
 while (Ethernet.begin(mac) != 1) {
 Serial.println("Error getting IP address via DHCP, trying again...");
 delay(15000);
 }
Serial.println("Network initialized");
 Serial.println();
 // print your local IP address:
 Serial.print("Arduino IP address: ");
 for (byte thisByte = 0; thisByte < 4; thisByte++) {
 // print the value of each byte of the IP address:
 Serial.print(Ethernet.localIP()[thisByte], DEC);
 Serial.print("."); 
 }
 Serial.println();
 Serial.println();

} // end of setup function
//////////////////////////// control loop ///////////////////////////
void loop() {
 // main program loop

 ////////////////////////////// Internet sending/receiving code ////////////////////////////////

 if (millis() - lastConnectionTime > connectionInterval) {

 // uncomment this to just send a random value...
 upCount = random(256);

 digitalWrite(ledPin, HIGH ); // turn on transmitter light
 sendData(upCount);
 // read the datastream back from Cosm - comment out to save time
 getData();
 digitalWrite(ledPin, LOW );
 // update connection time so we wait before connecting again
 lastConnectionTime = millis();

 }

 ///////////////////// end of internet send/receive code /////////////////

} // end of main loop code
/////////////////// additional functions //////////////////////////
////////////////////////////////////////////////////////////////////
// send the supplied value to Cosm, printing some debug information as we go
void sendData(int sensorValue) {
 datastreams[0].setFloat(sensorValue);
Serial.print("Read sensor value ");
 Serial.println(datastreams[0].getFloat());
Serial.println("Uploading to Cosm");
 int ret = cosmclient.put(feed, API_KEY);
 Serial.print("PUT return code: ");
 Serial.println(ret);
Serial.println();
}
// get the value of the datastream from Cosm, printing out the value we received
void getData() {
 Serial.println("Reading data from Cosm");
int ret = cosmclient.get(feed, API_KEY);
 Serial.print("GET return code: ");
 Serial.println(ret);
if (ret > 0) {
 Serial.print("Datastream is: ");
 Serial.println(feed[0]);
Serial.print("Sensor value is: ");
 Serial.println(feed[0].getFloat());
 }
Serial.println();
}
 

Leap Motion Midi synth in Max

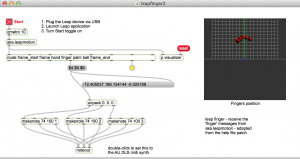
Midi notes triggered by finger movement

download

https://github.com/tkzic/max-projects

folder: leap-motion

patch: leapfinger2.maxpat

externals and dependencies

Download the aka.leapmotion external – and add it to your Max file path in options | file preferences: http://akamatsu.org/aka/max/objects/

instructions

  • plug in a Leap Motion sensor
  • Click the toggle to start reading Leap Motion data
  • Wave your fingers around to play notes

Guitar Hero controller installation Mac OS

Running the 0,08 driver in Mavericks. Also did a successful test install in Mac OS 10.8.

But later versions of the drivers don’t work.

instructions

1. download the following

2. If you need to un-install previous failed driver, what the video linked below for instructions. You will need to start a shell in terminal by typing:
sudo sh

Then drag the uninstaller file into terminal and run it. Note, you may need to make the .sh file executable by doing a: chmod +x on the file.

3. run the .dmg file for version .08 of installer

4. drag the controller list file into the controller list installer app (enter admin password twice)

5  restart computer

6. Plug in Guitar Hero controller. It should show up in system preferences xbox 360

Helpful hints from a previous post

http://youtu.be/OwMpV8p26xc

The above video was the key to doing a nearly impossible install. Here is the text from the Youtube info just in case the video disappears…

Uploaded by  on Feb 12, 2012

A tutorial on installing the Tattiebogle v0.08 drivers on Osx Lion

http://www.mediafire.com/?hnevrtloi5q
Controller list installer

http://www.mediafire.com/?mydit3c5195nmcu
Controller list

http://www.mediafire.com/?t4h08aixhar9oob
UnTattie – Uninstaller

http://www.mediafire.com/?wwjwqzyyzn5
0.08 version of TattieBogle drivers that will overwrite other versions
(May or may not work)

Tattiebogle’s page for getting v0.08
http://tattiebogle.net/index.php/ProjectRoot/Xbox360Controller/OsxDriver

Link to the forums containing tons of help on getting these drivers running right!
http://shoryuken.com/forum/index.php?threads/updated-360-controller-mac-drive…

Location of the files for manual deletion.

/Harddrive/System/Extensions/360Controller.kext
/Harddrive/System/Extensions/Wireless360Controller.kext
/Harddrive/System/Extensions/WirelessGamingReceiver.kext

/Harddrive/Library/StartUpItems/360ControlDaemon
/Harddrive/Library/PreferencePanes/Pref360Control.prefpane

And this last one may or may not be there but make sure and check just incase.
/Library/Receipts/Install360Controller.pkg

Here’s also another video I made teaching how to update the .plist yourself so assure you’re controller is compatible.
https://www.youtube.com/watch?v=qqiMkjjKkxI&feature=g-upl

It’s also good to note that it may help if after you run the uninstaller and/or manually delete the file that you do a secure trash empty with can be done from the desktop if you click Finder at the top there should be an “Empty Trash” and a “Secure Empty Trash” BE WARNED THOUGH this will permanently delete the files in your trash bin!

a Max patch

Fretbuzz by the guitarzeroes: https://reactivemusic.net/?p=1082

Max Wii remote examples

A collection of Wiimote patches

download

https://github.com/tkzic/max-projects

folder: wii

patches:

  • wiimote_read.maxpat
  • wii_vizzie_rotate.maxpat
  • ir5.maxpat
  • wiimote_ir_xy_synth2.maxpat
  • wiimote_pry_synth4.maxpat
  • bicycle speed sensor folder (under construction)
Osculator config file: wii3.oscd

installation (Osculator)

  • Download and install Osculator: http://www.osculator.net
  • Run the Osculator config file: wii3.oscd
  • Pair a Wiimote with Osculator (by pressing the red button)
  • Set Wiimote Osc output port to 9000
Other helpful tips:
  • Use a real Wii remote, not the Nyko. If you do get the Nyko, get the one with motion-plus.
  • update Osculator to the latest version
  • Under parameters (in osculator) press + to add the little pacman symbol labeled “same address”, and set the the OSC URL to whatever you’ll be using like 9000 for Max
  • remember to add the Event type (OSC routing) and value (pacman thing) for every wiimote event you’ll be using
  • remember to enter checkbox on the wiimote window for every type of data you want to send

Wiimote read patch

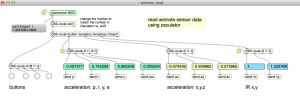
The patch: wiimote_read.maxpat is a common patch for reading data from Osculator into Max.

Load this patch and keep it running in the background for all of the other patches. You will know if the wiimote is working, if the data in the number boxes responds to movement of the Wiimote.

projects:

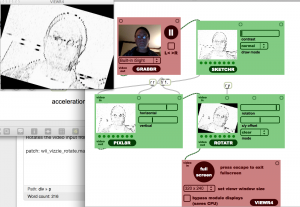
vizzie rotation effect

Rotates the video input from built in camera.

patch: wii_vizzie_rotate.maxpat

infra-red (IR) musical light painting

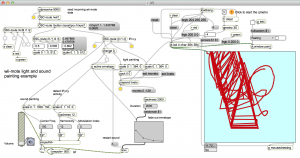
Paint using an IR transmitter.

patch: ir5.maxpat

helpful suggestions:

  • Make sure wii is transmitting raw IR data in Osculator
  • Turn on audio and turn up volume
  • Turn on [qmetro] for jitter

IR xy synth

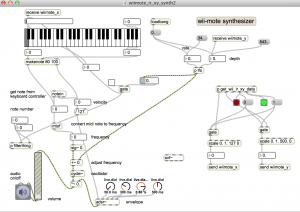
A synthesizer that responds to IR xy data

patch: wiimote_ir_xy_synth2.maxpat

helpful suggestions:

  • turn on audio
  • turn up volume
  • make an audible adsr envelope by turning up the adsr dials
  • increase lfo rate
  • check the wii-mode updreceive port (should match Osculator output)
  • experiment with the ‘gate’ toggle in the middle of the patch

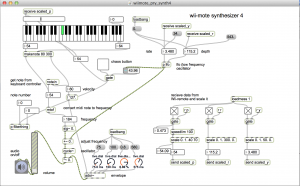
Pitch, roll, yaw (PRY) synth

A synth that responds to pitch, roll, and yaw data

patch: wiimote_pry_synth4.maxpat

bicycle engine simulation

synthesizes engine sounds based on RPM of bicycle wheel with Wiimote in the spokes

5/2014 : under construction – note – this patch not compatible with wiimote_read

  • waveguide_engine2c-bike.maxpat
  • wheelspeed.maxpat
  • bicycle2.maxpat

need to be running Osculator and tracking PRY stuff from Wii – need to adjust scale in engine patch. Also, select 3rd preset for engine sound.

So basically this setup needs to get standardized – use metro to send a steady stream of wheel data. Use the up to date car engine patch, etc., etc.,

A few problems with this concept – for example when the wheel is stopped the signal rate revs up to over 300  – I think because it rotates backwards for a second. Also when the wheel gets really fast, the pulses just stop!  – its like the wii-mote is overloaded or something? 4/3/2013 – I have it running so it tracks speed when the bicycle is upside down, as long as you don’t crank it too fast. but as mentioned above – the patch could be cleaned up and simplified.


Notes: Chatbots in Conversation

update 6/2014 – Now part of the Internet sensors projects: https://reactivemusic.net/?p=5859

original post

They can talk with each other… sort of.

Last spring I made a project that lets you talk with chatbots using speech recognition and synthesis. https://reactivemusic.net/?p=4710.

Yesterday I managed to get two instances of this program, running on two computers, using two chatbots,  to talk with each other, through the air. Technical issues remain (see below). But there were moments of real interaction.

In the original project, a human pressed button in Max to start and stop recording speech. This has been automated. The program detects and records speech, using audio level sensing. The auto-recording sensor turns on a switch when the level hits a threshold, and turns off after a period of silence. Threshold level and duration of silence can be adjusted by the user.  There is also a feedback gate that shuts off auto-record while the computer is converting speech to text, and ‘speaking’ a reply.

technical issues

  • The Google speech API has difficulty with some of the voices used by the Mac OS speech synthesizer. We’ll need to experiment to find which voices produce accurate results.
  • The overall levels produced by the builtin Macbook speakers is not quite enough to achieve clear communication. The auto-recorder missed the onset of speech sometimes. One solution would be to insert a click to trigger the recorder, just before the speech synthesizer begins the actual speech. Or to use external speakers, or a secondary “wired” connection.
  • It would be nice to have menus of chatbots and voices. Also to automate the start of a new conversation thread.
  • The button to start the audio detector had to be operated by key-press because pushing the trackpad on a MacBook makes too much noise and always triggers the audio level detector.
  • Occasionally a chat bot would deliver a long response, or one containing a web address. These were problematic for recognition and synthesis.

local files

  • tkzic/internetsensors/speech-to-google-text-api3.maxpat
  • tkzic/internetsensors/pandorabots-api2.maxpat
  • tkzic/internetsensors/text-to-speech3.maxpat


Leap air piano in Max

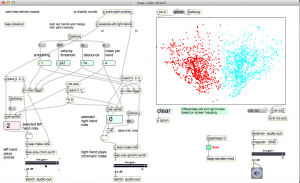
Actually in this context, the word ‘piano’ is way too generous. This is a prototype from October, that uses screen mapping to separate left and right hands. It decodes gestures by looking for high velocity downward hand movements. The gestures are mapped to notes and chords based on X position. There is much de-bouncing and tweaking to get results.

Here’s a demonstration which is somewhat painful to listen to, but gets the point across.

local files:

tkzic/max teaching examples/

  • leap-scale-draw5.maxpat
  • leap-sender.maxpat


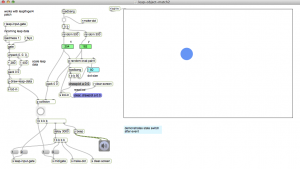
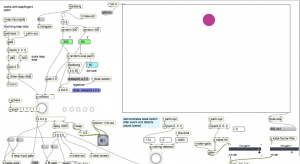
Leap Motion collision detection and state change

Collision detection and state change with Leap Motion and Max/MSP.

Second version adding musical finger-painting during the state change.

The 3rd version features a “lack of hand motion” detector which, along with collision detection, fades sounds and triggers state changes.

The non-activity detector is from a Max patch by Mattyo. The spectral filter is from a Max patch by Katja Vetter. In the filter the X,Y, and Z position of hands control number-of-bands, position, and peak width.


Local files:

For videos 1&2:

tkzic/max teaching examples/

  • leap-object-match2.maxpat
  • leapfinger4.maxpat
For video #3:
  • leap-dot-piano3.maxpat
  • leapfinger4.maxpat