Mapping geocoded contest log data using node.js and openlayers.
The goal was to make something that looks like the Reverse Beacon Network map, only for contest log files. I use RBN for testing antennas now. That map display gives you a pretty good idea of your actual antenna pattern.
Code is written in node.js (javascript) and html.
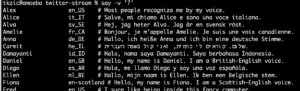
Part 1: Read a Cabrillo log file containing QSO: records. Look up each callsign, get latitude and longitude, and rewrite the file as json data, tagged with geo coordinates. I originally tried getting the data from hamQTH but it was not current, so ended up using the qrz.com xml callsign lookup. For callsigns “not found” I used the qrz.com dxcc prefix lookup to get general coordinates for the country. There are still a few bad/missing data issues to resolve. Like European stations with coordinates at the South Pole.
Part 2: Tried various mapping frameworks – like leaflet, arcgis, and openlayers. Wanted to use a great-circle projection (azimuthal equidistant) like the big ARRL world map. And may still figure this out. But working with map projections and coordinate transforms is way worse than doing a Smith Chart. I ended up hacking a flight tracking example from openlayers.org and basically replacing airplanes with QSO’s. That is why the lines are animated from source to destination. Also added a layer for day/night, and QSO/time status display.
It probably makes sense to get rid of the flight animation and just display the entire path in sync with the QSO data – with color code for each band (K1KP) – and speed control on the time lapse, etc., So you can get a better sense of rate and propagation.
It would be cool to have a website where you could upload a log file and generate maps.
Note: this project is not yet available
Files
local files:
generating data:
internetsensors/cabrillomap
put the cabrillo data in testdata.cbr (use QSO: records only for now) should be sorted chronologically.
run: node index.js
the output file will be: geocab.json (which is used as input to the mapping program)
mapping
internetsensors/oltest
main.js = node source with ol mapping and data processing
index.html = web page for map
geocab.json = geocoded cabrillo json test data
to run, type: npm start
Then open: http://localhost:5173/ in a browser
Additional work / current issues
Some of the qrz.com callsign data has bad geo coordinates. In particular some of the records show a latitude of -89 and longitute -179 – need to check for these numbers and replace with dxcc coordinates.
There should be an argument on the node program to pass in the datafile. Also the program should clean up any non QSO: records, like the file header info and any X-QSO recs.
Also need to clean up the async/await stuff – currently there are several methods for handling state transitions.
mapping ideas:
As mentioned above, its probably a good idea to make a version of the code without the flight animation, and have various controls to stop/start the data playback to look at individual qso’s do speed control, etc.,
azimuthal equidistant projection: there are some links to examples in leaflet, and arcgis to handle complex projections. In documents, look at: “map links for projection stuff.txt”
leaflet test version:
in the internetsensors/cabrillomap folder there’s a test file: cbworld1.html that works using websockets when you run the index.js file to generate test data. It uses a leaflet map, but the lines don’t adapt to great circle polar paths.
arcgis
I believe the arcgis examples are in internetsensors/projected geometries
And: internetsensors/pe-gs-projection
The former is a a very nice world projection with some point markers. The latter is an example that shows how to switch out various projections in realtime.