
“I think its just the biggest conceptual art project uninentional or otherwise that anyone ever made. it puts Christo and those other guys to shame. Its planetary”
Roman Mars “Episode 97 – Numbers Stations” from 99% Invisible
Radio
- Measuring the invisible
- What is the difference between sound waves and radio waves?
- What is an antenna?
- Wave propagation is frequency dependent
- Sunspots and magnetic fields http://spaceweather.com
- Extreme frequencies, negative frequencies?
examples
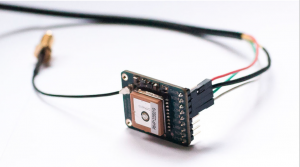
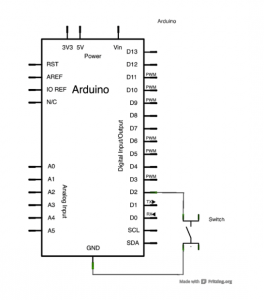
- A simple arduino AM transmitter https://reactivemusic.net/?p=4450 (antenna pin D8)
- Transmitting music using light https://reactivemusic.net/?p=8487
- Analog signals. Digital signals.
- Crystal sets. Inadvertent radio. Patch Cords.
- Software defined radio (cellphones, wiFi, bluetooth, etc., )
- Software defined radio in Max http://zerokidz.com/radio (The user guide http://zerokidz.com/radio/docs/maxsdr5.pdf and tutorials provide a basic introduction to working with radio signals in the audio domain.
- rtl-sdr – inexpensive software defined radio
- information http://sdr.osmocom.org/trac/wiki/rtl-sdr
- Where to buy one: http://www.nooelec.com/store/sdr/sdr-receivers/tv28tv2-sdr-dvb-t-usb-stick-set.html#.U2BX1K1dVKk
- installation https://reactivemusic.net/?p=8360
- sub-reddit http://sl.reddit.com/r/RTLSDR/
- Max and Pd externals https://github.com/tkzic/pd-rtlsdr
- Raspberry Pi FM transmitter https://reactivemusic.net/?p=10186
- Transmitting signals in water https://reactivemusic.net/?p=853
- The noise floor: Noise Floor: Exploring the world of unintentional radio emissions by Melissa Elliott: http://www.youtube.com/watch?v=5N1C3WB8c0o
Internet radio streams and recordings
- Roman Mars: Numbers Stations: http://99percentinvisible.org/episode/numbers-stations/
- You are listening to: http://youarelistening.to/boston
- broadcastify: http://www.broadcastify.com/listen/feed/15433/web
- the listening post: http://www.chilton.com/scripts/radio/R8-receiver
- Very Low Frequency: http://www-pw.physics.uiowa.edu/mcgreevy/
Frequencies and modes
- Macbook trackpad: Noise 5 mHz. (try holding radio near screen too)
- Macbook AC adapter: Noise 600-1400 kHz. (~1000)
- AC adapters, LED’s, Utility poles: 3.2 Khz
- Arduino transmitter: AM 1330 kHz.
- Laser light at 650nM
- What wavelength goes with a color? http://science-edu.larc.nasa.gov/EDDOCS/Wavelengths_for_Colors.html
- Frequency of red light is 4.6 * 10e14 = 300,000,000 / .000000650 (460 THz)
- Wireless micorophone (Orange-brown): Wide FM 614.150 MHz. (R band)
- Cordless phone: Narrow FM 926 mHz.
- Cell phone: Digitally encrypted trunking FM 836 mHz.
- Wifi: Digitally encoded PCM 2.4 gHz.
- FM broadcast band: Wide FM 89.7 mHz (Raspberry Pi example 98.1 Mhz)
- TV audio 600 mhz/660 mhz FMW
- The sun http://www.ips.gov.au/Solar/3/4
Topics not covered
(due to snow and stuff)
Visualization

- d3
- processing
- jitter
- hardware control
Statistics
- What are the chances?
- What to do next?
- improvisation. Randomness.
- r: http://www.r-project.org/
- Infinity row by Karlheinz Essl https://reactivemusic.net/?p=9222
- Music recognition. Deep learning.
Miscellaneous
- Enhanced automobile audio https://github.com/tkzic/automax
Assignment
Please send me a copies of your earlier compositions. Have a prototype ready to demonstrate or talk about for the next class.