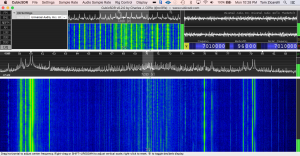
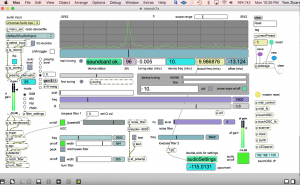
MBTA API in Max

Sonification of Mass Ave buses, from Nubian to Harvard.

Updated for Max8 and Catalina

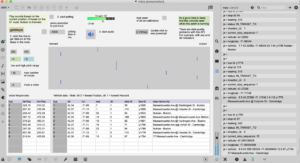
This patch requests data from MBTA API to get the current location of buses – using the Max js object. Latitude and Longitude data is mapped to oscillator pitch. Data is polled every 10 seconds, but it seems like the results might be more interesting to poll at a slower rate, because the updates don’t seem that frequent. And buses tend to stop a lot.

Original project link from 2014: https://reactivemusic.net/?p=17524

MBTA developer website: https://www.mbta.com/developers

This project uses version 3 of the API. There are quality issues with the realtime data. For example, there are bus stops not associated with the route. The direction_id and stop_sequence data from the buses is often wrong. Also, buses that are not in service are not removed from the vehicle list or indicated as such.

The patch uses a [multislider] object to graph the position of the buses along the route – but due to the data problems described above, the positions don’t always reflect the current latitude/longitude coordinates or the bus stop name.

download

https://github.com/tkzic/internet-sensors

folder: mbta

patches:

  • mbta.maxpat
  • mbta.js
  • poly-oscillator.maxpat
authentication

You will need  to replace the API key in the message object at the top of the patch with your own key. Or you can probably just remove it. The key distributed with the patch is fake. You can request your own developer API key from MBTA. It’s free.

instructions
  • Open mbta.maxpat
  • Open the Max console window so you can see what’s happening with the data
  • click on the yellow [getstops] message to get the current bus stop data
  • Toggle the metro (at the top of the patch) to start polling
  • Turn on the audio (click speaker icon) and turn up the gain

Note: there will be more buses running during rush hours in Boston.  Try experimenting with the polling rate and ramp length in the poly-oscillator patch. Also, you can experiment with the pitch range.

Soundcloud API in Max8

This post describes an updated project.

The earlier version can be found here  https://reactivemusic.net/?p=5413

This project is part of the internet-sensors project: https://reactivemusic.net/?p=5859

Note

2024/01/21: not working:

Soundcloud deleted my API credentials and is not accepting new requests. So there is really no point to using this project unless you have active credentials.

console.error() function crashes node. -fixed locally

Overview

In this patch, Max uses the Soundcloud API to search tracks and then select a result to download and play. It uses the node.js soundcloud-api-client https://github.com/iammordaty/soundcloud-api-client

For information on the soundcloud API http://developers.soundcloud.com/docs/api/reference

download

https://github.com/tkzic/internet-sensors

folder: soundcloud

files

main Max patch
  • sc.maxpat
node.js files
  • scnode.js

authorization

  • The Soundcloud client-id is embedded in scnode.js – you will need to edit this file to replace the worthless client-id with your own. To get a client ID you will first need a Soundcloud account. Then register an app at: http://soundcloud.com/you/apps

first time instructions

  • Open the Max patch: sc.maxpat
  • In the green panel, click on [script npm init]
  • In the green panel , click on [script install soundcloud-api-client]

instructions

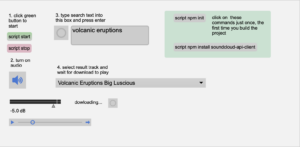
  • Open the Max patch sc.maxpat
  • open the max.console window so you can see the API data
  • click [script start]
  • click the speaker icon to start audio
  • type something into the search box and press <enter> or click the button to the left to search for what is already in the box.
  • select a track from the result menu, wait for it to start playing

Spotify segment analysis player in Max

Echo Nest API audio analysis data is now provided by Spotify. This project is part of the internet-sensors project: https://reactivemusic.net/?p=5859

There is an older version here using the discontinued Echo Nest API: https://reactivemusic.net/?p=6296

Note:  Last tested 2024/01/21

The original analyzer document by Tristan Jehan can be found here (for the time being):  https://web.archive.org/web/20160528174915/http://developer.echonest.com/docs/v4/_static/AnalyzeDocumentation.pdf

This implementation uses node.js for Max instead of Ruby to access the API. You will need set up a developer account with Spotify and request API credentials. See below.

Other than that, the synthesis code in Max has not changed.  Some of the following background information and video is from the original version. ..

What if you used that data to reconstruct music by driving a sequencer in Max? The analysis is a series of time based quanta called segments. Each segment provides information about timing, timbre, and pitch – roughly corresponding to rhythm, harmony, and melody.

spotify-synth1.maxpat

download

https://github.com/tkzic/internet-sensors

folder: spotify2

files

main Max patch
  • spotify-synth1.maxpat
abstractions and other files
  • polyvoice-sine.maxpat
  • polyvoice2.maxpat
node.js code
  • spot1.js
node folders and infrastructure
  • /node_modules
  • package-lock.json
  • package.json
dependencies:
  • You will need to install node.js
  • the node package manager will do the rest – see below.

Note: Your best bet is to just download the repository, leave everything in place, and run it from the existing folder

authentication

You will need to sign up for a developer account at Spotify and get an API key. https://developer.spotify.com/documentation/general/guides/authorization-guide/

Edit spot1.js replacing the cliendID and clientSecret with your spotify credentials

node for max install instructions (first time only)

  •  Open the Max patch: spotify-synth1.maxpat
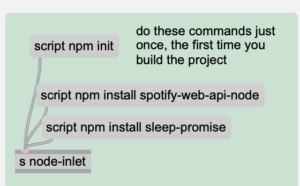
  •  Scroll the patch over to the far right side until you see this green panel:

  • Click the [script npm init] message – this initializes the node infrastructure in the current folder
  • Then click each of the 2 script npm install messages –  this installs the necessary libraries

Instructions

  •  Open the Max patch: spotify-synth1.maxpat
  •  Click the green [script start] message
  • Click the Speaker icon to start audio
  • Click the first dot in the preset object to set the mixer settings to something reasonable
  • open the Max Console window so you can see the Spotify API data
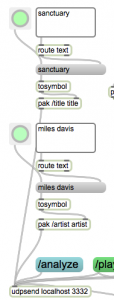
  • From the 2 menus at the top of the screen select an Artist and Title that match, for example: Albert Ayler and “Witches and Devils”
  • Click the [analyze] button – the console window should fill with interest data about your selection.
  • Click [play]
  • Note: if you hear a lot of clicks and pops, reduce the audio sample rate to 44.1 KHz.
Alternative search method:

Enter an Artist and Song title for analysis, in the text boxes. Then press the buttons for title and artist. Then press the /analyze button. If it works you will get prompts from the terminal window, the Max window, and you should see the time in seconds in upper right corner of the patch.

troubleshooting

If there are problems with the analysis, its most likely due to one of the following:

  • artist or title spelled incorrectly
  • song is not available
  • song is too long
  • API is busy
Mixer controls

The Mixer channels from Left to right are:

  • bass
  • synth (left)
  • synth (right)
  • random octave synth
  • timbre synth
  • master volume
  • gain trim
  • HPF cutoff frequency
You can also adjust the reverb decay time and the playback rate. Normal playback rate is 1.

programming notes

Best results happen with slow abstract material, like the Miles (Wayne Shorter) piece above. The bass is not really happening. Lines all sound pretty much the same. I’m thinking it might be possible to derive a bass line from the pitch data by doing a chordal analysis of the analysis.

Here are screenshots of the Max sub-patches (the main screen is in the video above)

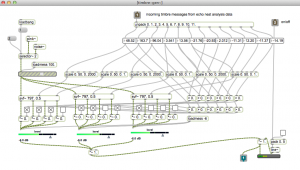
Timbre (percussion synth) – plays filtered noise:

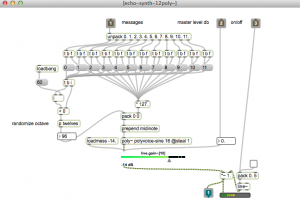
Random octave synth:

Here’s a Coltrane piece, using roughly the same configuration but with sine oscillators for everything:

There are issues with clicks on the envelopes and the patch is kind of a mess but it plays!

Several modules respond to the API data:

  • tone synthesiszer (pitch data)
  • harmonic (random octave) synthesizer (pitch data)
  • filtered noise (timbre data)
  • bass synthesizer (key and mode data)
  • envelope generator (loudness data)

Since the key/mode data is global for the track, bass notes are probable guesses. This method doesn’t work for material with strong root motion or a variety of harmonic content. It’s essentially the same approach I use when asked to play bass at an open mic night.

additional notes

Now that this project is running again. I plan to write additional synthesizers that follow more of the spirit of the data. For example, distinguishing strong pitches from noise.

Also would like to make use of  the [section] data as well as the rhythmic analysis. There is an amazing amount of potential here.

Max8radio CubicSDR I/Q prototype

Another working prototype with Max and CubicSDR

Now working some better… The Max SDR patch is receiving an IQ audio stream at 96 KHz from CubicSDR and sending frequency data to rigctld daemon via a python script that recodes OSC to tcp data.

repository: https://github.com/tkzic/max8radio

Files:

max8sdr1.maxpat

py3rigctl2.py (python script)

Instructions:

Basically the same as instructions in the previous prototype here: https://reactivemusic.net/?p=19995

make sure to start the rigctl daemon before CubicSDR

 rigctld -m 1 4532 & 

And make sure there is some audio gain on CubicSDR

But… There is only one Max patch now and – after you start the rigcltd daemon, you need to run the python script in the max8radio folder like this:

python3 py3rigctl2.py

The most important thing is to start CubicSDR first before you run the Max patch. Make sure to get everything working correctly. Then start the Max SDR.

In CubicSDR make sure you only have one “modem” running – otherwise the IQ data stream will be a complete mess. Als0 make sure that the audio sample rate in CubicSDR is set to 96 KHz. It will revert to 48 KHz. everytime you load the program. You can use the ‘bookmarks’ from a previous CubicSDR session (lower left part of the screen) to load a previous session with the same parameters.

These are the necessary settings:

  • I/Q modem
  • Audio out: Existential Audio Inc. Blackhole 2 ch.
  • Audio sample rate: 96 KHz.
  • Rig Control Menu: enable rig and follow rig should be ‘checked’
  • Frequency should equal Center frequency and the V delta lock toggle should be on
  • Demodulator Gain level should be very low to prevent excess AGC (upper right corner)

Actually if you have loaded everything ok in a previous session, try this:

  • get the rigctld daemon running from the command
  • load CubicSDR
  • First thing: click ‘enable rig’ under rig control (this will probably load some crazy frequency like 145 Mhz
  • Then in the bookmarks (lower left) double click on your previous session, under ‘recents’ for example: 7007MHzI/Q – this should restore almost all the settings.
  • Then change the audio sample rate to 96 KHz if needed.
  • If the input to Max seems wrong, try clicking the S  (over near the top right)  to solo the modems. There may be more than one going.

Max settings

  • Set audio input to Blackhole 2ch @ 96 KHz. (to match output from CubicSDR
  • Click the ‘flip IQ’ toggle – for some reason CubicSDR sends out the I/Q signal flipped
  • The arrow key tuning and all other tuning methods should work now

Notes

One of the problems with CubicSDR is sometimes you’ll accidentally change something and all the settings go crazy.

note: I tried a new version of CubicSDR (2.6) from the sdrplay website. It would not detect any connected devices or audio drivers.

Once you get it working, the audio quality inside Max is excellent – using the Airspy HF+

Python3 tcp client for Max

Using OSC from [udpsend]

I needed a better way to send radio frequency data from Max to a rigcltd daemon (via tcp). This is the method of tuning SDR devices hosted by CubicSDR.

From the max8radio folder run:

py3rigctl2.py

The input is OSC frequency data, on port 8001, in the form: /F 7001000

(This would be for 7.001 MHz)

An OSC server in the python program listens for these messages and then reformats and sends them to a running rigctld daemon running in the background on port 4532

rigctld -m 1 4532 &

The frequency message going to rigctld would be in the format: F+ 7001000


Max8radio project

New version of software define radio for Max/MSP  (in progress)

github repository: https://github.com/tkzic/max8radio

Notes

goals and strategy

The new approach will be to remove most of the device handling code from Max. Instead providing device interfaces from existing device libraries, like soapy-sdr, hamlib, gnu-radio, etc., The Max portion of the project will read IQ files, perform DSP, and other magic.

The first platform will be Max8 in Mac OS Catalina

projects

Max + CubicSDR + hamlib

See working prototype below. This setup uses CubicSDR as a device driver to send IQ data into Max’s input audio stream. CubicSDR supports many devices via soapySDR. It supports networked rig control via Hamlib.

Advantages of this system: It works now. It runs in Windows. It runs over the a local network. The software is managed and distributed by somebody else.

Disadvantages: Its not an elegant solution – ie., not self contained within Max. It requires installation and setup of CubicSDr. The software is managed and distributed by somebody else – so it could stop working at any time.

rx_tools + hamlib

rx_tools is an update of some of the rtl tools, like rtl_fm. It includes soapySDR device support. If hamlib is added to rx_tools, then you could do the same networked frequency control, and IQ streaming as CubicSDR – using rigctld. Without the overhead of running CubicSDR. The downside it that it’s yet another program to maintain and distribute.

Next step: look at source code for rx_tools and estimate scope of hamlib intergration.

openwebrx and websdr API

openwebrx  https://www.openwebrx.de/

Websdr  http://websdr.org/

These sites provide access to SDR devices connected to web servers. Although they don’t stream IQ data, it would be interesting to build a Max front end to the APIS.

background information

See previous posts:

External programs required

  • hamlib (macports)
  • cubicSDR (see link above)
  • netcat (nc) (built into Mac OS terminal)

notes on rigctld commands

Best results using one letter commands with single quotes:

echo 'F 7023000' | nc -w 1 localhost 4532

Prepend ‘+’ for more feedback, like this:

% echo '+F 7023000' | nc -w 1 localhost 4532
set_freq: 7023000
RPRT 0

Latest prototypes

Links to latest working projects (from newest to oldest)


First Max test project

This is an update of the test done with CubicSDR and RTLSDR as described here: https://reactivemusic.net/?p=19802

CubicSDR is great but eventually the goal is to pare down the interface between the SDR device and Max. Something like a command line IQ filter would be ideal:  https://github.com/xmikos/simplesoapy

Hardware and system setup

This test uses an Airspy Discovery HF+, but any device supported in CubicSDR should work – that’s the point of this exercise.

Using BlackHole from Existential Audio https://existential.audio/blackhole/

as an alternative to Soundflower to route the IQ (audio stream) data from CubicSDR to Max. You could also use a cable to connect output of one audio device to input of another, etc.,

Signal path:

Antenna -> Airspy -> CubicSDR -> rigctld -> Max

CubicSDR settings

  • Plug in Airspy device before launching CubicSDR, so it will be discovered on the setup screen
  • On the main display, click just to the right of the mode buttons to bring up a drop down menu of audio devices
  • select I/Q mode
  • select the audio device, or “BlackHole 2ch”, that you will use to route audio to Max
  • click on any of the frequency digits, press space, and enter in the same frequency as the Center Frequency (e.g., 7000000)
  • click the ‘V’ to the left of the frequency digits, to select ‘delta lock mode’. This causes the frequency and center frequency to sync.
  • Be careful not to click anywhere in the waterfall window – or this will mess up the sync
  • Under Rig Control menu:
    • Select “Hamlib NET rigctl” as the model
    • Enter localhost:4532 as the control port
    • Select 57600 as the serial rate
    • Make sure that “follow rig” and “floating center” are checked
    • After you get the rigctld daemon started, come back here and ‘Check’ ‘enable rig’. If it doesn’t stay checked, then there is a problem with the connection.
  • Under the Audio sample rate menu, select the correct sample rate for your audio device (e.g. 96k)

Notes: It seems there is some kind of AGC hardwired into CubicSDR.  https://github.com/cjcliffe/CubicSDR/issues/826

TCP and rigctld settings

  • Open a terminal window
  • type: rigctld -m 1 4532 &
  • This starts the server running in the background using the HAMLIB test dummy rig
  • to set frequency to 7.010 MHz, type:

    echo ‘F 7010000’ | nc -w 1 localhost 4532

  • This should change the center frequency and frequency in CubicSDR

Max settings

For this test, you can use any of the MaxSDR tutorials available  at https://github.com/tkzic/max8radio

We’ll be using maxsdr7a.maxpat

ignore the max-console messages about missing externals.

The key is to choose the default audio input device and set it to be the same as what is coming out of CubicSDR.  ie., “BlackHole 2ch”

  • Set the audio input device to match CubicSDR, as described above. Also match the sample rate (e.g., 96k)
  • Set the audio output device to your internal soundcard/speakers
  • Start audio and recall preset 1 or some normal settings for SSB
  • It should be receiving I/Q data now from Cubic SDR
  • Note: may need to flip the I/Q input due to anomaly in CubicSDR.
  • Now load another Max patch to do the frequency control: rigctld1.maxpat
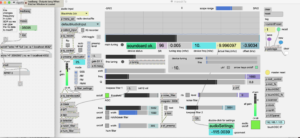
This patch sends frequency data to the rigctld daemon via the [shell] object. You can change the frequency using the number box.

That’s about it for now.
Updating Max/MSP internet sensor projects

Notes for updating from Max6 to Max8 in Mac OS Catalina

In general, 32 bit code will not work

Link to internetsensors project: https://reactivemusic.net/?p=5859

Github: https://github.com/tkzic/internet-sensors

1. mxj object

Need to update, but the Oracle link leads to a dead end message. Go to the Oracle download link https://www.oracle.com/java/technologies/javase/javase-jdk8-downloads.html but instead of pressing the green download button, <ctrl> click and save the link as described in the instructions from intrepidOlivia in this link https://gist.github.com/wavezhang/ba8425f24a968ec9b2a8619d7c2d86a6

2. aka.objects

I have used aka.shell, and aka.speech – among others. These objects no longer work. Replace with Jeremy Bernstein’s shell object: https://github.com/jeremybernstein/shell/releases/tag/1.0b2

NOTE: There’s a problem with [shell] – it rejects input that is converted to a symbol using [tosymbol].

This can be fixed by using from symbol – or just eliminating [tosymbol] – it make affect the stderr-stdout redirection token, ie., “>” and other special characters but for now [shell] does not accept symbol input

aka.speech can be replaced using the “say” command in the shell.  more details to follow about voice parameters.

‘say’ has similar params to aka.speech, eg., voice name and rate. There are voices for specific languages. This feature could be used, for example, to match the language from a Tweet to an appropriate voice

3. Twitter streaming API

I revised the php code for the Twitter streaming project, to use the coordinates of a corner of the city polygon bounding box. That seems to be more reliable than the geo coordinates which are absent from most Tweets.

There is a new API in the works – but its difficult to decipher the Twitter API docs because they have so many products and the documentation is obtuse.

Also it would be interesting to extract the “language” field and use it to select which voice to use in the speech synthesizer. Or even have an english translation option.

4. Echonest API

Echonest was absorbed into Spotify. The API is gone. But the Spotify API does have some of the feature detection and analysis code. But it doesn’t allow you to submit your own audio clips. There are also some efforts to preserve some of the Echonest stuff like the blog by Paul Lamere, and the remix code. Here are a few links I found to get started.

Spotify API (features) https://developer.spotify.com/console/get-audio-features-track/?id=06AKEBrKUckW0KREUWRnvT

Echonest blog:  https://blog.echonest.com/

Amen – algorithmic remix project:  https://github.com/algorithmic-music-exploration/amen

5. Google speech to text

Several issues:

  • Replacing [aka.shell] with [shell] – instead of using [tosymbol], this workaround seems to help

  • Now have rewritten all of the recording code, and shell interactions with Google.
  • Still need to work on voice options for the ‘say’ command (text to speech)
  • pandorabots API problems turned out that the URL needed to be https instead of http

6. twitter curl project

Looks like xively.com is gone. Maybe purchased by google? Anyway – this project is toast

7. Twitter via Ruby

Got this working again.

8. Bird calls from xeno-canto.com

This patch has been completely re-written. The old API was obsolete. This version uses [dict] and [maxurl] to format and execute the initial query. Then it uses [jit.uldl] to download the mp3 file with the bird-call audio.  Interesting that [maxurl] would not download the file using the “download” URL. It only worked with a URL containing the actual file name.

9. ping

Needed to reinstall ruby gems using xcrun (see above)

seems to be a problem with mashape:

Could not resolve host: igor-zachetly-ping-uin.p.mashape.com (Patron::HostResolutionError)

[mashape was acquired by rapidapi.com – so will need to refactor the code in the ruby server.]


Generic SDR realtime IQ converter

With CubicSDR, HAMLIB, and Max

update: 1/25/2021 – Using this general setup with Airspy, CubicSDR, rigctld, and netcat (nc) to send IQ data into the basicSDR3.maxpat patch


CubicSDR uses the SoapySDR library as generic tool for extracting realtime IQ data streams from common SDR devices. It also provides TCP external frequency control using HAMLIB.

http://cubicsdr.com/

Although its not the main purpose of CubicSDR, the IQ streaming capability will connect SDR devices to Max, Pd, and other DSP platforms, to build experimental radios. All without building external objects or hardware device drivers.  The convenience of using CubicSDR for this purpose far outweighs the overhead.

A prototype with Max and rtl_sdr

How to use CubicSDR as a front-end for SDR experiments in Max.

The signal path for this test is:

  1. antenna
  2. NooElec HAM IT UP upconverter
  3. rtl-sdr dongle
  4. CubicSDR
  5. Soundflower (or a “loop-backed” external audio device)
  6. Max

Running in the other direction, the frequency control path is:

  1. netcat running in Mac OS X terminal (or a Max patch that sends TCP)
  2. rigctld (hamlib TCP server)
  3. CubicSDR
  4. rtl-sdr dongle

There’s a lot of stuff going on here, so the choice to use hardware audio routing instead of Soundflower and netcat instead of TCP in Max, is an effort toward simplicity.

CubicSDR settings:

  • Plug in the rtl-sdr before launching CubicSDR, so it will be discovered on the setup screen
  • On the main display, click just to the right of the mode buttons to bring up a drop down menu of audio devices
  • select I/Q mode
  • select the audio device, or Soundflower, that you will use to route audio to Max
  • If using an upconverter, set the ‘frequency offset’ in the settings menu (e.g. -125000000)
  • click on any of the frequency digits, press space, and enter in the same frequency as the Center Frequency (e.g., 7000000)
  • click the ‘V’ to the left of the frequency digits, to select ‘delta lock mode’. This causes the frequency and center frequency to sync.
  • Be careful not to click anywhere in the waterfall window – or this will mess up the sync
  • Under Rig Control menu:
    • Select “Hamlib NET rigctl” as the model
    • Enter localhost:4532 as the control port
    • Select 57600 as the serial rate
    • Make sure that “follow rig” and “floating center” are checked
    • ‘Check’ ‘enable rig’. If it doesn’t stay checked, then there is a problem with the connection.
  • Under the Audio sample rate menu, select the correct sample rate for your audio device (e.g. 96k)

TCP and rigctld settings

  • Open a terminal window
  • type: rigctld -m 1 4532 &
  • This starts the server running in the background using the HAMLIB test dummy rig
  • to set frequency to 7.010 MHz, type:

    echo ‘F 7010000’ | nc -w 1 localhost 4532

  • This should change the center frequency and frequency in CubicSDR

Max settings

For this test, you can use any of the MaxSDR tutorials available at https://github.com/tkzic/maxradio but I chose to use the main program, currently maxsdr7a.maxpat. The key is to choose the default audio input device and set it to be the same as what is coming out of CubicSDR.  I used a stereo patch cord to connect the line output of my Apollo Twin interface to the input jacks – but you can also use Soundflower.

  • Set the audio input device to match CubicSDR, as described above. Also match the sample rate (e.g., 96k)
  • Set the audio output device to your internal soundcard/speakers
  • You may need to toggle the flip IQ button
  • Start audio and recall preset 1 or some normal settings for SSB
  • It should be receiving I/Q data now from Cubic SDR

Links:

Installing Hamlib: https://reactivemusic.net/?p=19402

Installing CubicSDR: https://github.com/cjcliffe/CubicSDR/releases

Supported SDR devices: https://reactivemusic.net/?p=19746

Notes:

I had some success using the Max TCP external described at the Installing Hamlib link above, but temporarily abandoned it due to some latency and dropouts.

Local version of this patch is: tcpClient-small2.maxpat

Next steps:

  • hardware (i.e., MIDI controller) control of frequency – and refinement of Max TCP patch. Can likely re-use the patch from the remote radio project.
  • Convert to PD : TCP/IP code is builtin
  • Consider forking CubicSDR and adding direct MIDI/OSC control of UI.