Guitar Hero controller installation Mac OS

Running the 0,08 driver in Mavericks. Also did a successful test install in Mac OS 10.8.

But later versions of the drivers don’t work.

instructions

1. download the following

2. If you need to un-install previous failed driver, what the video linked below for instructions. You will need to start a shell in terminal by typing:
sudo sh

Then drag the uninstaller file into terminal and run it. Note, you may need to make the .sh file executable by doing a: chmod +x on the file.

3. run the .dmg file for version .08 of installer

4. drag the controller list file into the controller list installer app (enter admin password twice)

5  restart computer

6. Plug in Guitar Hero controller. It should show up in system preferences xbox 360

Helpful hints from a previous post

http://youtu.be/OwMpV8p26xc

The above video was the key to doing a nearly impossible install. Here is the text from the Youtube info just in case the video disappears…

Uploaded by  on Feb 12, 2012

A tutorial on installing the Tattiebogle v0.08 drivers on Osx Lion

http://www.mediafire.com/?hnevrtloi5q
Controller list installer

http://www.mediafire.com/?mydit3c5195nmcu
Controller list

http://www.mediafire.com/?t4h08aixhar9oob
UnTattie – Uninstaller

http://www.mediafire.com/?wwjwqzyyzn5
0.08 version of TattieBogle drivers that will overwrite other versions
(May or may not work)

Tattiebogle’s page for getting v0.08
http://tattiebogle.net/index.php/ProjectRoot/Xbox360Controller/OsxDriver

Link to the forums containing tons of help on getting these drivers running right!
http://shoryuken.com/forum/index.php?threads/updated-360-controller-mac-drive…

Location of the files for manual deletion.

/Harddrive/System/Extensions/360Controller.kext
/Harddrive/System/Extensions/Wireless360Controller.kext
/Harddrive/System/Extensions/WirelessGamingReceiver.kext

/Harddrive/Library/StartUpItems/360ControlDaemon
/Harddrive/Library/PreferencePanes/Pref360Control.prefpane

And this last one may or may not be there but make sure and check just incase.
/Library/Receipts/Install360Controller.pkg

Here’s also another video I made teaching how to update the .plist yourself so assure you’re controller is compatible.
https://www.youtube.com/watch?v=qqiMkjjKkxI&feature=g-upl

It’s also good to note that it may help if after you run the uninstaller and/or manually delete the file that you do a secure trash empty with can be done from the desktop if you click Finder at the top there should be an “Empty Trash” and a “Secure Empty Trash” BE WARNED THOUGH this will permanently delete the files in your trash bin!

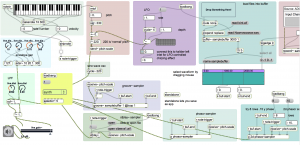
a Max patch

Fretbuzz by the guitarzeroes: https://reactivemusic.net/?p=1082
Osc synth in Max

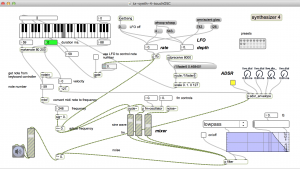
Simple synthesizer controlled by touchOsc

download

https://github.com/tkzic/max-projects

folder: osc-synth

patch: tz-synth-4-touchOSC.maxpat

notes

Shows how to use an ipod or iphone as a controller

components:

  • Max/MSP
  • ipod touch
  • touchOSC

instructions

  1. setup touchOSC on the ipod to send to the host ip address that Max is running on – using port 8000 to send data.
  2. In the Max patch, try one of the last presets for a reasonable synth sound.
  3. In touchOSC, use the top (horizontal ) slider in the ‘simple’ layout.


green screen in Max

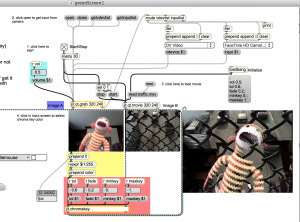
Live chroma-key example using the built-in camera.

Hacked from jitter help files…

download

https://github.com/tkzic/max-projects

folder: chroma-key

patch: greenScreen1.maxpat

instructions
  • click open (screen grab)
  • click read – to open a movie file
  • click start/stop toggle
  • in the grab viewer, select the background color to chromakey, by clicking with mouse
notes

This really works best with an external camera and a large monochromatic background.

components:

  • Max/MSP – Jitter
  • builtin camera

Max Wii remote examples

A collection of Wiimote patches

download

https://github.com/tkzic/max-projects

folder: wii

patches:

  • wiimote_read.maxpat
  • wii_vizzie_rotate.maxpat
  • ir5.maxpat
  • wiimote_ir_xy_synth2.maxpat
  • wiimote_pry_synth4.maxpat
  • bicycle speed sensor folder (under construction)
Osculator config file: wii3.oscd

installation (Osculator)

  • Download and install Osculator: http://www.osculator.net
  • Run the Osculator config file: wii3.oscd
  • Pair a Wiimote with Osculator (by pressing the red button)
  • Set Wiimote Osc output port to 9000
Other helpful tips:
  • Use a real Wii remote, not the Nyko. If you do get the Nyko, get the one with motion-plus.
  • update Osculator to the latest version
  • Under parameters (in osculator) press + to add the little pacman symbol labeled “same address”, and set the the OSC URL to whatever you’ll be using like 9000 for Max
  • remember to add the Event type (OSC routing) and value (pacman thing) for every wiimote event you’ll be using
  • remember to enter checkbox on the wiimote window for every type of data you want to send

Wiimote read patch

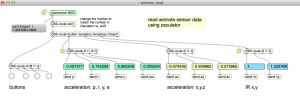
The patch: wiimote_read.maxpat is a common patch for reading data from Osculator into Max.

Load this patch and keep it running in the background for all of the other patches. You will know if the wiimote is working, if the data in the number boxes responds to movement of the Wiimote.

projects:

vizzie rotation effect

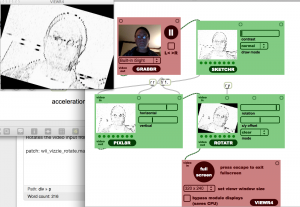
Rotates the video input from built in camera.

patch: wii_vizzie_rotate.maxpat

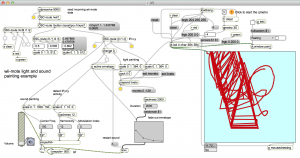
infra-red (IR) musical light painting

Paint using an IR transmitter.

patch: ir5.maxpat

helpful suggestions:

  • Make sure wii is transmitting raw IR data in Osculator
  • Turn on audio and turn up volume
  • Turn on [qmetro] for jitter

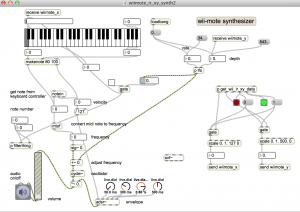
IR xy synth

A synthesizer that responds to IR xy data

patch: wiimote_ir_xy_synth2.maxpat

helpful suggestions:

  • turn on audio
  • turn up volume
  • make an audible adsr envelope by turning up the adsr dials
  • increase lfo rate
  • check the wii-mode updreceive port (should match Osculator output)
  • experiment with the ‘gate’ toggle in the middle of the patch

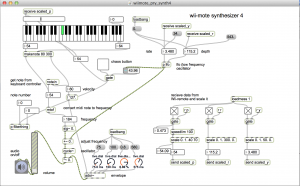
Pitch, roll, yaw (PRY) synth

A synth that responds to pitch, roll, and yaw data

patch: wiimote_pry_synth4.maxpat

bicycle engine simulation

synthesizes engine sounds based on RPM of bicycle wheel with Wiimote in the spokes

5/2014 : under construction – note – this patch not compatible with wiimote_read

  • waveguide_engine2c-bike.maxpat
  • wheelspeed.maxpat
  • bicycle2.maxpat

need to be running Osculator and tracking PRY stuff from Wii – need to adjust scale in engine patch. Also, select 3rd preset for engine sound.

So basically this setup needs to get standardized – use metro to send a steady stream of wheel data. Use the up to date car engine patch, etc., etc.,

A few problems with this concept – for example when the wheel is stopped the signal rate revs up to over 300  – I think because it rotates backwards for a second. Also when the wheel gets really fast, the pulses just stop!  – its like the wii-mote is overloaded or something? 4/3/2013 – I have it running so it tracks speed when the bicycle is upside down, as long as you don’t crank it too fast. but as mentioned above – the patch could be cleaned up and simplified.


Conversnitch

“Conversnitch is a small device that automatically tweets overheard conversations, bridging the gap between (presumed) private physical space and public space online.”

By Brian House and Kyle McDonald

Note: 6/2021 – This project has not been updated for 7 years, but surveillance is alive and well.

https://github.com/brianhouse/Conversnitch

(Uses Raspberry Pi)

Google Maps in Max

Draw points in Max by sending latitude and longitude to a Web client via Osc and web sockets.

Uses Ruby, WebSockets, Chrome, Google Maps API, Osc, Max, Jquery, and Node.js… But the Max patch is actually quite simple.

Based on this geocoding tutorial:  http://www.sitepoint.com/google-maps-api-jquery/

download

https://github.com/tkzic/internet-sensors

folder: google-maps

files

main Max patch
  • googlemaptest.maxpat
html and javascript for Google API
  • js/ (folder containing javascript code for map client)
  • markers.html (web client)
ruby
  • mapserver.rb (Osc and Websockets server)
node.js (optional)
  • nodeserver.js (local node.js webserver)

running node.js local web server (optional)

To run the project locally, you will either need to install node.js or have a local web server. The instructions assume that you have installed node, as well as the http package.

If you don’t want to bother with node, there is also an online version of the web client running at  http://zerokidz.com/gmap/markers/markers.html

intalling ruby gems

Running Ruby 2.0 as well as the following gems:

  • osc-ruby
  • em-websocket
  • json

instructions

1. If you are using the online Web client, go to this URL in a Google Chrome browser: http://zerokidz.com/gmap/markers/markers.html then skip to step 4.

2. In a terminal window start the node webserver

node nodeserver

3. Launch a Google Chrome web browser and type in this URL

127.0.0.1:8081/markers.html

4. In another terminal window start the ruby server for Osc and websockets

ruby mapserver.rb

5. Now in the Web Client (Chrome) press the “OSC” button underneath the map – to open the web sockets connection with the ruby server.

6. Open the Max patch:

googlemaptest.maxpat

7. Now you should be able to click on the message boxes for Bethel and Rumford in the Max patch to add location markers to the map in the browser.