Conversation with a robot in Max

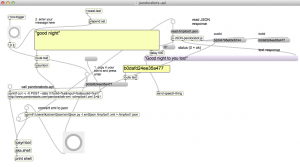
This project brings together several examples of API programming with Max. The pandorabots.api patch contains an example of using curl to generate an XML response file, then converts XML to JSON using a Python script. The resulting JSON file is read into Max and parsed using the [js] object.

Here is an audio recording of my conversation (using Max) with a text chatbot named ‘Chomsky’

‘Chomsky’ lives at http://pandorabots.com.

My voice gets recorded by Max then converted to text by the Google speech-api.

The text is passed to the Pandorabots API. The chatbot response gets spoken by the aka.speech external which uses the Mac OS built-in text-to-speech system.

Note: The above recording was processed with a ‘silence truncate’ effect because there were  3-5 second delays between responses. In realtime it has the feel of the Houston/Apollo dialogs.

pandorabots-api.maxpat (which handles chatbot responses) gets text input from speech-to-google-text-api2.maxpat – a patch that converts speech to text using the Google speech-API.

https://reactivemusic.net/?p=4690

The output (responses from chatbot) get sent to twitter-search-to-speech2.maxpat which “speaks” using the Mac OS  text-to-speech program using the aka.speech external.

files

Max

  • speech-to-google-text-api2.maxpat
  • JSON-google-speech.js
  • pandorabots-api.maxpat
  • JSON-pandorabot.js
  • text-to-speech2.maxpat

externals:

[authorization]

  • none required

external programs:

  • sox: sox audio conversion program must be in the computer’s executable file path, ie., /usr/bin – or you can rewrite the [sprintf] input to [aka.shell] with the actual path. Get sox from: http://sox.sourceforge.net
  • xml2json (python) in tkzic/internetsensors/: xml2json/xml2json.py and xml2json/setup.py (for translating XML to JSON) – [NOTE] you will need to change the path in the [sprintf] object in pandorabots.api to point to the folder containing this python script.

instructions

  • Open the three Max patches.
    • speech-to-google-text-api2.maxpat
    • pandorabots-api.maxpat
    • text-to-speech2.maxpat
  • Clear the custid in the pandorabots-api patch
  • Start audio in the Google speech patch. Then toggle the mic button and say something.
  • After the first response, go to the pandorabots-api patch and click the new custid – so that the chatbot retains the thread of the conversation.

download:

The files for this project can be downloaded from the intenet-sensors archive at github
https://github.com/tkzic/internet-sensors

Pandorabots API

Update: Now part of Internet Sensors project: https://reactivemusic.net/?p=9834  

original post

Looking into using an API to communicate with chatbots

Here is info from pandorabots FAQ: http://www.pandorabots.com/botmaster/en/~15580d493a63acc7fab1820f~/faq

Chomsky bot id: botid=b0dafd24ee35a477

H.2 Is there an API allowing other programs to talk to a Pandorabot?

Pandorabots has an API called XML-RPC that you can use to connect third-party software to our server. The XML-RPC has been used to connect Pandorabots to a wide variety of third-party applications, including Mified, mIRC, Second Life and Flash.

You may interact with Pandorabots as a webservice. Pandorabots offers consulting services supporting arbitrary web services for premium services customers. Please contact [email protected] for more information.

A client can interact with a Pandorabot by POST’ing to:

http://www.pandorabots.com/pandora/talk-xml

The form variables the client needs to POST are:

  • botid – see H.1 above.
  • input – what you want said to the bot.
  • custid – an ID to track the conversation with a particular customer. This variable is optional. If you don’t send a value Pandorabots will return a custid attribute value in the <result> element of the returned XML. Use this in subsequent POST’s to continue a conversation.

This will give a text/xml response. For example:

<result status="0" botid="c49b63239e34d1d5" custid="d2228e2eee12d255">
  <input>hello</input>
  <that>Hi there!</that>
</result>

The <input> and <that> elements are named after the corresponding AIML elements for bot input and last response. If there is an error,status will be non-zero and there will be a human readable <message> element included describing the error. For example:

<result status="1" custid="d2228e2eee12d255">
  <input>hello</input>
  <message>Missing botid</message>
</result>

Note that the values POST’d need to be form-urlencoded.

[update}

Here are two examples I just got to work using curl

curl -X POST  --data "botid=b0dafd24ee35a477&input=hello" http://www.pandorabots.com/pandora/talk-xml

curl -X POST  --data "botid=b0dafd24ee35a477&input=Where are you?" http://www.pandorabots.com/pandora/talk-xml
Here is the result for the second question
<result status="0" botid="b0dafd24ee35a477" custid="b3422b612633ac87"><input>Where are you?</input><that>I am in the computer at Pandorabots.com.</that></result>

Sending Tweets from Arduino through Pachube.com

http://www.tigoe.com/pcomp/code/arduinowiring/1135/#more-1135

from Tom Igoe

(update) I have got this working, exactly as described in the Igoe post – The code is in EthernetPachubeTweeter_tz1.

Essentially, anything that originates from the Arduino is sent to a feed in Pachube. That feed has a datastream which has a trigger which tweets any new data which arrives.

The next thing to try is figuring out whether this can be done as a single line http: request in curl, and therefore, from Max – or any other source

(update) – this is slightly broken – check out the post about converting cosm to xively https://reactivemusic.net/?p=6843]


RC car using Arduino with xbee radios

Bi-directional wireless control of motors

tested 5/2014

The potentiometer on the control radio changes the motor speed of the RC car. A potentiometer on the other side controls the brightness of an LED at the controller.

making things talk

The xbee code was adapted from Tom Igoe’s full-duplex Wireless example, chapter 6 – “Making Things Talk” (using an improved version from his blog: http://www.makingthingstalk.com/chapter6/30/#more-30

The xbee radios should be set up as directed – starting on p. 195

Here are the xbee settings:

ATMY ATDL ATDH ATID
Radio 1 1234 5678 0 1111
Radio 2 5678 1234 0 1111

construction

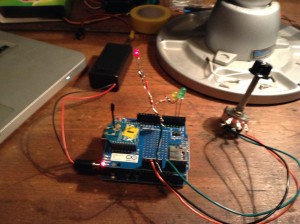
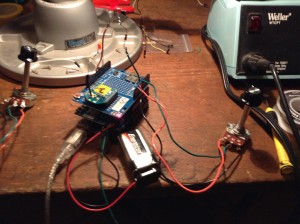
2 stacks:

1) arduino + wireless SD shield + xbee

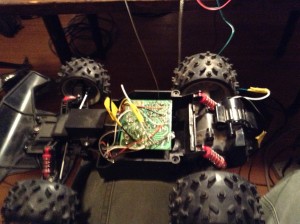
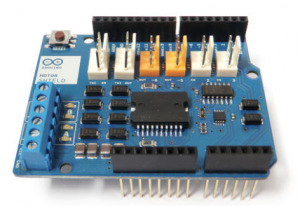
2) arduino + motor shield + wireless SD shield + xbee  (motor shield hooked to RC car motor)

Each stack has a potentiometer, tx/rx leds, LED for remote brightness control, and batteries.

The motor shield has connections to the RC car motor and 9V battery for power.

code

Code for radio 1: xbee_full_duplex2_radio1.ino

The motor side uses a few lines of code from an instructables.com motor shield tutorial. LED brightness is linked to motor speed – sent out on pin 3 – from the Arduino sketch:

http://www.instructables.com/id/Arduino-Motor-Shield-Tutorial/?ALLSTEPS

code for radio 2 (car): xbee_full_duplex2_radio2_motor.ino

note:

When loading the sketch, set the slide switch on the Wireless-SD shield to ‘USB’ – then switch it back to “micro” to run.

If the controller radio (radio 1) is connected to a computer, open the Arduino serial monitor – or the sketch will block – and nothing will happen.

Download

[wpdm_file id=20]

circuit layout

radio 1
  • pin A0 : input sensor (potentiometer)
  • pin 2 : tx LED
  • pin 3 : rx LED
  • pin 9: test LED (receives brightness data)
radio 2
  • pin A0 : input sensor (potentiometer)
  • pin 3: used internally for motor speed – (the motor is hooked to Channel A on the motor shield)
  • pin 4 : tx LED
  • pin 5 : rx LED
  • pin 10: test LED (receives brightness data)

Re-assign some of the pins from the xbee example so they aren’t on the same ones as the motor shield is using:  Here’s the pin layout that the motor shield uses. i.e.. these are the pins that are used in an Arduino sketch to control each motor function. This project only controls ‘speed’ on channel A (pin 3).

Function Channel A Channel B
Direction Digital 12 Digital 13
Speed (PWM) Digital 3 Digital 11
Brake Digital 9 Digital 8
Current Sensing Analog 0 Analog 1

notes

This Arduino forum post was also helpful – otherwise I would have assumed that the shields were incompatible:

Stacking Arduino Wifi Shield and Arduino Motor Shield