maxradio updates

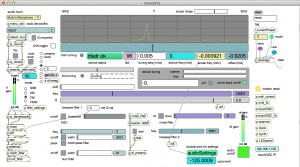
Upgrade to Mac OS Max version.

Windows, runtime, standalone, and documentation upgrades still in progress…

changes

This is an interim update to add new drivers.

  • driver for rtl-sdr
  • minor bug fixes

download

https://github.com/tkzic/maxradio

instructions

  • Connect a radio
  • Open maxsdr7a.maxpat 

note: 1/23/2015 – the repository was really messed up – missing externals, etc., have reloaded. The local source is now at tkzic/maxradio

Osc synth in Max

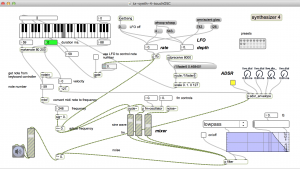
Simple synthesizer controlled by touchOsc

download

https://github.com/tkzic/max-projects

folder: osc-synth

patch: tz-synth-4-touchOSC.maxpat

notes

Shows how to use an ipod or iphone as a controller

components:

  • Max/MSP
  • ipod touch
  • touchOSC

instructions

  1. setup touchOSC on the ipod to send to the host ip address that Max is running on – using port 8000 to send data.
  2. In the Max patch, try one of the last presets for a reasonable synth sound.
  3. In touchOSC, use the top (horizontal ) slider in the ‘simple’ layout.


hardware control of webaudio API

programming

This is a tweak of a demo program by Boris Smus from http://webaudioapi.com

The audio is generated in the web browser using the webaudio API. Oscillator frequency is being controlled by an iPod touch running touchOSC.

A ruby program is running in the background. It starts 2 servers, one to handle Osc messages from the iPod. and a websockets server which passes Osc messages to the web client in the browser, which parses the data and sets oscillator frequency.

local source files in tkzic/web-audio-api/webaudioapi/content/posts/oscillator-ws

instructions

(these are for my local files – source has not been published yet) Please contact me directly for more information about this code. Or have a look at a very similar example at: https://github.com/tkzic/WebAudio

1. run the node webserver in tkzic/

node nodeserver.js

(it will run on localhost port 8081 – for example http://127.0.0.1:8081)

2. In Chrome web browser, run: http://192.168.1.104:8081/web-audio-api/webaudioapi/content/posts/oscillator-ws/index.html

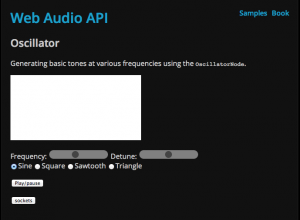
The following screen will appear:

3. From a terminal prompt run this ruby script (in tkzic/web-audio-api/webaudioapi/content/posts/oscillator-ws)

./wapOSCserver.rb

4. In webpage in Chrome, click the sockets button – the ruby server should open a socket connection, also click the play/pause button to start the oscillator

5. In touchOSC point the host to the ip address of the laptop (ie., 192.168.1.104) running on default ports, (out 8000, in 9000)

6. In touchOSC run the ‘simple’ layout and move fader1 to change the pitch of the oscillator

Note: You will probably also want to open the developer javascript console in Chrome to see what is going on.

next step

Need to clean up the ruby server code to handle error conditions, ie., network interruptions, missing files, browser incompatibility, etc.,


Raspberry-Pi FX pedal

Running in Pure Data

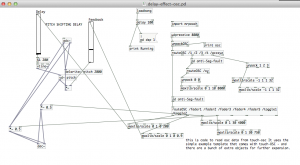
(update) Tried this with guitarist John Drew today (2/26/2012). We ran the guitar directly into the iMic (switched to microphone, not line) and the output of iMic into an amplifier. The R-Pi was plugged into to wifi router with an Ethernet cable, so we could use touchOsc to control the delay parameters. It sounded great.

We talked about the possibility of making this into a ‘product’. One idea would be to ditch the Osc controls and build a simple hardware interface – some encoders, switches, and LED’s. You could map everything in PD and download new patches using an ethernet cable or a usb wifi connection – or even some kind of serial/usb link.

Yesterday I programmed a simple variable delay effect in pd to run on Raspberry-Pi. Control was using touchOSC as described in previous posts. I ran the effect in mono at 32k sampling rate – and it sounded great. Also its using the Griffin iMic for sound.

Here’s the command line to set the sample rate and number of channels:

pd-extended -r 32000 -nogui -channels 1 delay-effect-osc.pd


Local files:


Arduino with touchOSC and Max

Bi-directional communication from touchOSC to Arduino using an ethernet shield.
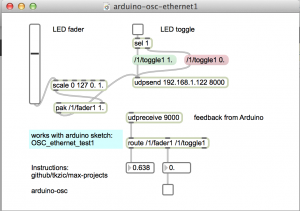
In this version, the Macbook is directly connected to the Arduino to provide a serial monitor for status updates. 

How it works: press a toggle, or move a fader, in touchOSC – it sends a message to the Arduino which lights up, or fades, an LED – then sends back an OSC message to touchOSC to light up the toggle button. (note: local feedback should be off for the toggle button in touchOSC. This is the default)

Arduino circuit
  • Use an ethernet shield. 
  • Connect ethernet cable. (I am using a Netgear WNCE2001 ethernet to wiFi adapter)
  • LED is connected to pin 5 and ground. The shorter lead connects to ground.

download

https://github.com/tkzic/max-projects

folder: arduino-osc

files
  • Arduino sketch: OSC_ethernet_test1/
  • touchOSC screen: simple (default) uses /1/fader1 and /1/toggle1
  • Max patch: arduino-osc-ethernet1.maxpat
Arduino files and libraries

***update 1/20/2016 there is a new sketch that uses the OSCuino library from CNMAT instead of ardosc. The sketches should be interchangeable. https://github.com/CNMAT/OSC . The sketch is in a folder called: OSCuino_tz and is based on work by Trippylightning at: http://trippylighting.com/teensy-arduino-ect/touchosc-and-arduino-oscuino/

Copy the OSC_ethernet_test1/ folder to Documents/Arduino. This puts it in the Arduino sketchbook.

The sketch uses: #include <ArdOSC.h>

Download ArdOSC from: https://github.com/recotana/ArdOSC

  1. After downloading, copy the ArdOSC-master folder to /Documents/Arduino/Libraries
  2. Rename the folder to ArdOSC

This post was the key to figuring out how to make this work: http://arduino.cc/forum/index.php?topic=137549.0

Instructions
  1. Connect Arduino to Macbook via USB.
  2. Open the Arduino serial monitor to initialize the ethernet connection and display the IP address.
touchOSC
  1. In touchOSC or Max, set the target IP to the one just displayed in the Arduino serial monitor
  2. From touchOSC (or Max) send on port 8000, receive on port 9000.
  3. Use the default touchOSC layout (simple)
  4. Use /fader1 and /toggle1 to control the LED
Max
  1. Open arduino-osc-ethernet1.maxpat
  2. Set ip address in [udpsend] to the one just displayed in the Arduino serial monitor
  3. Have some fun
Fixed IP address

update 1/2016: A version of the Arduino sketch that uses a fixed IP instead of DHCP is located in the folder: OSC_ethernet_fixedIP/

The IP is set to 192.168.1.177 but you can change it to any valid address on your network.

Arduino sketch
// generic Arduino OSC program 
// works from Max or touchOSC
//
// plug LED into pin 5 (and gnd)
//
// requires ethernet shield
//
// use serial monitor to get the ip address
//
// use these OSC commands (will work from first page of touchOSC simple layout
//
// /1/fader1
// /1/toggle1
//
#include <SPI.h>
#include <Ethernet.h>
#include <ArdOSC.h>

byte mac[] = { 0x90, 0xA2, 0xDA, 0x0D, 0x0B, 0xCE }; //physical mac address
OSCServer server;
OSCClient client;
int serverPort = 8000; //Touch OSC Port (outgoing)
int destPort = 9000; //Touch OSC Port (incoming)
int ledPin = 5; 
int flag=0;
void setup(){
pinMode(2, OUTPUT);
 Serial.begin(9600); 
 Serial.println("DNS and DHCP-based OSC server");
 // start the Ethernet connection:
 if (Ethernet.begin(mac) == 0) {
 Serial.println("Failed to configure Ethernet using DHCP");
 // no point in carrying on, so do nothing forevermore:
 while(true);
 }
 // print your local IP address:
 Serial.print("Arduino IP address: ");
 for (byte thisByte = 0; thisByte < 4; thisByte++) {
 // print the value of each byte of the IP address:
 Serial.print(Ethernet.localIP()[thisByte], DEC);
 Serial.print("."); 
 }
 Serial.println();
 Serial.println();
//start the OSCserver
 server.begin(serverPort);
//add OSC callback function. One function is needed for every TouchOSC interface element that is to send/receive OSC commands.
 server.addCallback("/1/toggle1", &funcOnOff);
 server.addCallback("/1/fader1", &funcFader);
}
void loop(){
if(server.aviableCheck()>0){
 // Serial.println("alive! ");
 } 
}
//When the button on the TouchOSC inteface is pressed, a message is sent from the iDevice
//to the Arduino to switch (togle) the LED on the Arduino on/off
//then a messeage is sent bak from the Arduino to the iDevice to toggle the buttom on/off
void funcOnOff(OSCMessage *_mes){
 float value = _mes->getArgFloat(0); //TouchOSC expects float values
//create new osc message
 OSCMessage newMes;
//set destination ip address & port no
 newMes.setAddress(_mes->getIpAddress(),destPort);
 newMes.beginMessage("/1/toggle1");
Serial.println(value);
 if(value < 1.0) {
 digitalWrite(ledPin, LOW);
 }
 else{
 digitalWrite(ledPin, HIGH);
 }
newMes.addArgFloat(value);
//send osc message
 //
 // turn local feedback off on touch-osc control to test this
 client.send(&newMes);
}
// new callback for fader - using same comments
//When the button on the TouchOSC inteface is pressed, a message is sent from the iDevice
//to the Arduino to switch (togle) the LED on the Arduino on/off
//then a messeage is sent bak from the Arduino to the iDevice to toggle the buttom on/off
void funcFader(OSCMessage *_mes){
 float value = _mes->getArgFloat(0); //TouchOSC expects float values
//create new osc message
 OSCMessage newMes;
//set destination ip address & port no
 newMes.setAddress(_mes->getIpAddress(),destPort);
 newMes.beginMessage("/1/fader1");
Serial.println(value);
 int ledValue = value * 255.0;
 analogWrite(ledPin, ledValue);
newMes.addArgFloat(value);
//send osc message
 //
 // turn local feedback off on touch-osc control to test this
 client.send(&newMes);

}