Videosync remix projects

New experiments using Videosync with Ableton Live.

A remix of “Gappa the Triphibian Monster”, 1967 directed by Haruyasu Noguchi. Produced using Ableton Live 12 and Videosync. Editing was done using LosslessCut for slicing and CapCut for editing. The underwater sequence uses the Ableton Audio Effects Rack: “Dawn Shimmers”.

Yet another remix of “Invasion of The Neptune Men” by Koji Ota. Produced with Videosync, Ableton Live, and Lossless Cut. The editing was done entirely in Live. Probably not a great way to do extensive video edits. And there was some trouble with Live 11, but the problems resolved by installing Live 12.

Another tribute to “The Invasion of The Neptune Men” by Koji Ota Produced with Videosync in Ableton Live. This was my first effort with Videosync. I tried to edit the video based on the sounds of the clips.

Recording Ableton Videosync output

Video recording options for Videosync in Ableton Live

Syphon Recorder.

https://syphon.github.io/recorder

  1. In Videosync preferences, set master Syphon out.
  2. In syphonrecorder set Videosync master as input.
  3. In syphonrecorder set virtual audio as input (eg., blackhole 2ch)
  4. In Ableton, set blackhole 2ch as audio output (or make a multioutput device in audoMidiSetup, combining headphones and blackhole.)

Vizzie Recorder.

(see this post about Vizzie Syphon abstractions https://reactivemusic.net/wp-admin/post.php?post=20896&action=edit)

  1. setup a Syphon client in Max
  2. Use abstractions to bring video into Vizzie. and use Vizzie recorder object.
  3. Route audio as described above.

Screenflick (or other screen recording software)

  1. Set screenflick to overlay videosync output window in Ableton Live
  2. Route audio as described above.

Milford Graves Experiment

Milford Graves was one of my all time favorite musicians. His approach to percussion, and music generally, was unique in a way that defies explanation.

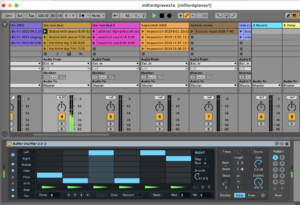
I sampled a bunch of clips of his drumming into Ableton live and then experimented with the Buffer Shuffler 2.0 device to see if I could randomize small slices, ie., several seconds each, of longer samples – without losing the “texture” of the original recordings.

Here is an example of what it sounds like:

This video shows a clip from David Murray’s “Real Deal” running through Buffer Shuffler using slices only about 2-3 seconds in length. The slicing rate is just arbitrary, since there is no warping or specific clock pulse.

Local files: tkzic/aardvark/milfordgraves1 project/milfordgraves1a.als

Glacier Sounds

Overlapping loops of varying duration to represent natural cycles.

glacier1

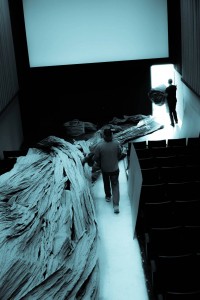
In October I collaborated with Wade Kavanaugh and Stephen P. Nguyen to compose and perform the sounds of a glacier for their installation at the Gem theatre in Bethel, Maine. The glacier was made from paper.

Wade and Stephen:

wadeandsteven

A time-lapse video of the project:

A time-lapse video of a similar project they did in Minnesota 2005:

The approach was to take a series of ambient loops and organize them by duration. The longer loops would represent the slow movement of time. Shorter loops would represent events like avalanches. One-shot samples would represent quick events, like the cracking of ice.

It took several iterations to produce something slow and boring enough to be convincing. I used samples from the Ron MacLeod’s Cyclic Waves library from Cycling 74 https://www.ableton.com/en/packs/cyclic-waves/. Samples were pitched down to imply largeness.

Screen Shot 2015-12-21 at 1.09.59 AM

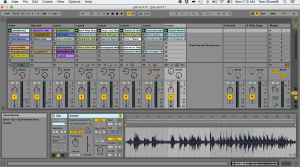
Each vertical column in an Ableton Live set represents a time-frame of waves. That is, the far left column contains quick events and the far right column contains long cycle events. Left to right, the columns have gradually increasing cycle durations.  I used a Push controller to trigger samples in real time as people walked through the theatre to see the glacier.

The theatre speakers were arranged in stereo but from front to back. Since the glacier was also arranged along the same axis, a slow auto-panning effect sent sounds drifting off into the distance, or vice versa. Visually and sonically there was a sense that the space extended beyond the walls of the theatre.

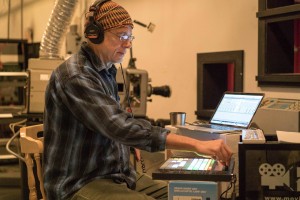
In the “control room” above the theatre… using Push to trigger samples and a Korg NanoKontrol to set panning positions of each track:

glacer2

The performance lasted about 45 minutes. Occasionally the cracking of ice would startle people in the room. There were kids crawling around underneath the paper glacier. Afterwards we just let the sounds play on their own. A short excerpt:


Photographs by Rebecca Zicarelli.

Presets in Max for Live

How to use the Max preset object inside of M4L.

Screen Shot 2015-03-22 at 8.06.14 PM

There is some confusion about how to use Max presets in a M4L device. The method described here lets you save and recall presets with a device inside of a Live set, without additional files or dialog boxes. It uses pattrstorage. It works automatically with the Live UI objects.

It also works with other Max UI objects by connecting them to pattr objects.

Its based on an article by Gregory Taylor: https://cycling74.com/2011/05/19/max-for-live-tutorial-adding-pattr-presets-to-your-live-session/

Download

https://github.com/tkzic/max-for-live-projects

Folder: presets

Patch: aaa-preset3.amxd

How it works:

Instructions are included inside the patch. You will need to add objects and then set attributes for those objects in the inspector.  For best results, set the inspector values after adding each object

Write the patch in this order:

A1. Add UI objects.

For each UI object:

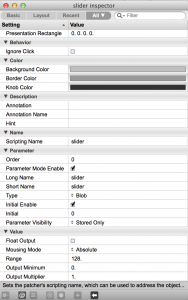
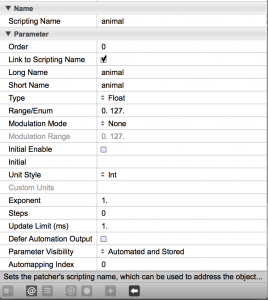
  1. check link-to-scripting name
  2. set long and short names to actual name of param
Screen Shot 2015-03-22 at 8.44.23 PM

A2 (optional) Add non Live (ie., Max UI objects)

For each object, connect the middle outlet of a pattr object (with a parameter name as an argument) to the left inlet of the UI object. For example:

Screen Shot 2015-03-22 at 8.30.24 PM

Then in inspector for each UI object:

  1. check  parameter-mode-enable
  2. check inital-enable

Screen Shot 2015-03-22 at 8.51.10 PM

B. Add a pattrstorage object.

Screen Shot 2015-03-22 at 8.35.28 PM

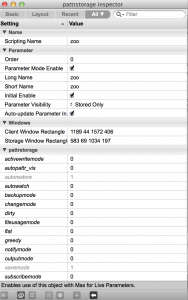
Give the object a name argument, for example: pattrstorage zoo. The name can be anything, its not important. Then in the inspector for pattrstorage:

  1. check parameter-mode enable
  2. check Auto-update-parameter Initial-value
  3. check initial-value
  4. change short-name to match long name

Screen Shot 2015-03-22 at 8.42.49 PM

C. Add an autopattr object

Screen Shot 2015-03-22 at 8.34.21 PM

D. Add a preset object

Screen Shot 2015-03-22 at 8.34.53 PM

In the inspector for the preset object:

  1. assign pattrstorage object name from step B. (zoo) to pattrstorage attribute

Screen Shot 2015-03-22 at 8.52.11 PM

 Notes

The preset numbers go from 1-n. They can be fed directly into the pattrstorage object – for example if you wanted to use an external controller

You can name the presets (slotnames). See the pattrstorage help file

You can interpolate between presets. See pattrstorage help file

Adding new UI objects after presets have been stored

If you add a new UI object to the patch after pattrstorage is set up, you will need to re-save the presets with the correct setting of the new UI object. Or you can edit the pattrstorage data.


The Live Object Model in Max for Live

Introduction to getting, setting, and observing Live parameters with Max for Live.

Screen Shot 2015-03-04 at 11.48.03 AM

download

https://github.com/tkzic/max-for-live-projects

folder: lom

patch: aaa-lom-examples

tutorial

This example device shows several ways of working with Ableton Live parameters in a M4L patch. It can be a confusing process. And there are many different ways to accomplish the same result.

The examples here will use the LOM (Live Object Model) directly, and via builtin LiveAPI abstractions and choosers – available from the context menu that appears when you <ctrl> click inside of an open patcher window.

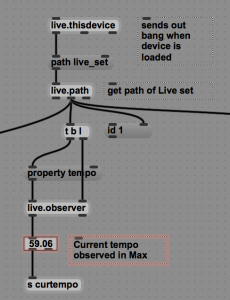
live.observer

Screen Shot 2015-03-04 at 11.57.45 AM

The snippet above shows how to continuously monitor Live’s tempo.

  • live.this.device sends out a bang when the device loads
  • the “path live_set” message tells live.path to get an id number for the current set. This id is sent to the right inlet of live.observer, telling it we want to observe the current Live set
  • the “property tempo” message asks live.observer for the current tempo value
  • If the tempo changes it will be automatically updated
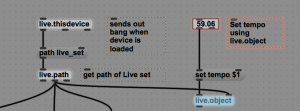
live.object (set)

Screen Shot 2015-03-04 at 12.09.49 PM

The snippet above shows how to set Live’s tempo.

  • Get the Live set path id using the same method as shown for live.observer
  • the “set tempo” message sends a tempo value to live.object
live.object (get)

Screen Shot 2015-03-04 at 12.15.57 PM

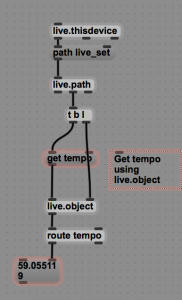
The snippet above shows how to get Live’s tempo.

  • Get the Live set path id using the same method as shown for live.observer
  • the “get tempo” message requests the current tempo value from live.object
live.object (call)

Screen Shot 2015-03-04 at 12.23.11 PM

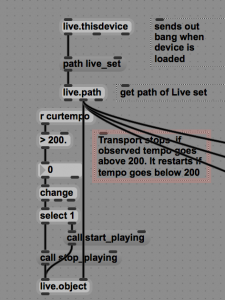
The snippet above shows how to start or stop the Live transport by calling functions.

  • Get the Live set path id using the same method as shown for live.observer
  • the “call start_playing” message tells live.object to start the Live transport. “start_playing” is the name of a function builtin to the Live set.
LiveAPI abstractions

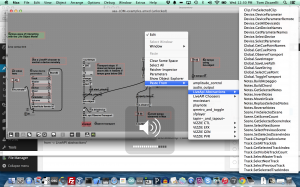
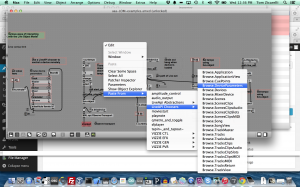
The LiveAPI abstractions provide convenient shortcuts to working with Live parameters. Copy them into your patch by <ctrl> clicking inside an open (unlocked) patcher window – and selecting “Paste from -> LiveAPI abstractions”

Screen Shot 2015-03-04 at 12.30.25 PM

Observing the Live transport

Screen Shot 2015-03-04 at 12.31.49 PM

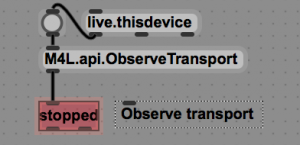
The snippet above shows how to monitor whether the Live transport is running

  • paste the abstraction into your patch as explained above
Selecting the master track

Screen Shot 2015-03-04 at 12.34.07 PM

The snippet above shows how to select the Master track

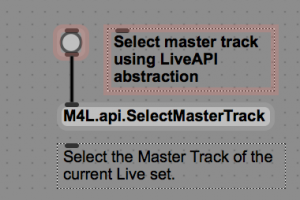
  • paste the abstraction into your patch as explained above
LiveAPI choosers

The LiveAPI choosers provide convenient shortcuts to selecting Live parameters from menu objects. Copy them into your patch by <ctrl> clicking inside an open (unlocked) patcher window – and selecting “Paste from -> LiveAPI choosers”

Screen Shot 2015-03-04 at 12.36.43 PM

Setting device parameters remotely with live.remote

Screen Shot 2015-03-04 at 12.38.29 PM

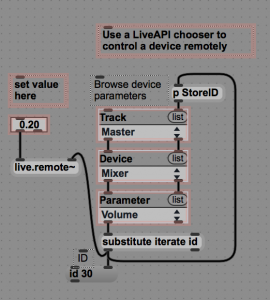
The snippet above shows how to remotely set the volume on the master track

  • paste the chooser into your patch as explained above
  • connect the left outlet of “substitute” to the right inlet of live.remote
  • send values to live.remote to change the selected parameter

Patches for Cycling 74 “Programming in Max for Live” videos

These are my versions of some of the patches. Not Cycling 74’s. If you find ‘official’ versions please let me know. The list isn’t complete. The simpler (beginning) patches are not included, but the interesting ones are.

Screen Shot 2015-02-23 at 12.50.20 PM

download

https://github.com/tkzic/max-for-live-projects

folder: c74-video-tutorials

Sub-folders:

  • API-step-sequencer
  • dub-delay
  • poly-synth
  • velocity-sequencer
  • wobble-bass
Instructions

In Live, create new Max for Live devices, as instructed in the videos – and then copy and paste from these patches into your new patches.