Synthesize real pictures of fake Tweets
xively.com feed with Arduino
[Note: xively.com is gone. This system doesn’t work. Post is here for historical reasons only]
Bi-directional communication from Arduino to a xively.com feed using an ethernet shield.
- Initializes an internet connection (DHCP)
- Connects to xively.com servers every minute
- Stores random value in the feed using HTTP PUT
- Retrieves current feed value using HTTP GET
- Lights up LED when transmitting
Arduino circuit
- Use an ethernet shield.
- Connect ethernet cable. (I am using a Netgear WNCE2001 ethernet to wiFi adapter)
- LED is connected to pin 5 and ground. The shorter lead connects to ground.
download
[wpdm_file id=18 title=”true” ]
files
- xively_test1 (Arduino sketch)
Arduino files and libraries
Copy the xively_test1/ folder to Documents/Arduino. This puts it in the Arduino sketchbook.
Notes on installing xively/cosm/pachube libraries for arduino: https://reactivemusic.net/?p=4900
Instructions
- Connect Arduino to Macbook via USB.
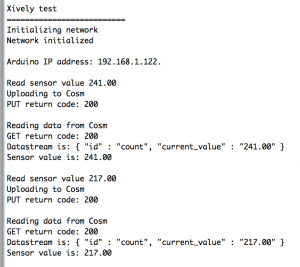
- Open the Arduino serial monitor to initialize the ethernet connection and display the IP address.
- Every minute data gets send to the feed
- Monitor feed data here: https://xively.com/feeds/98281/workbench
Arduino sketch
/*
5/20/2014 - Arduino/xively feed interaction
Uses Ethernet Shield and and LED connected between pin D5 and ground
Sends a random value to a xively.com feed every minute
The LED lights up during data transmissions
demonstrates:
HTTP PUT - send data to xiveyly feed and store
HTTP GET - read xively feed value
*/
#include <SPI.h>
#include <Ethernet.h>
#include <HttpClient.h>
#include <Cosm.h>
int ledPin = 5;
int upCount = 0; // counters for number of times going up and down
#define API_KEY "96PqSh4rj7HzNif3WtTpN7GjX96SAKxrWms3SUhwaDFGUT0g" // your Cosm API key
#define FEED_ID 98281 // your Cosm feed ID
// MAC address for your Ethernet shield
byte mac[] = { 0x90, 0xA2, 0xDA, 0x0D, 0x0B, 0xCE };
// note that pins 0 and 1 are used by the Ethernet shield
unsigned long lastConnectionTime = 0; // last time we connected to Cosm
const unsigned long connectionInterval = 60000; // delay between connecting to Cosm in milliseconds
// Initialize the Cosm library
// Define the string for our datastream ID
char sensorId[] = "count";
CosmDatastream datastreams[] = {
 CosmDatastream(sensorId, strlen(sensorId), DATASTREAM_FLOAT),
};
// Wrap the datastream into a feed
CosmFeed feed(FEED_ID, datastreams, 1 /* number of datastreams */);
EthernetClient client;
CosmClient cosmclient(client);
void setup() {

 // initialize the detector pins

 pinMode(ledPin, OUTPUT ); // internet transmitting indicator
 // start the Monitor (console) serial port

 Serial.begin(9600);
// display happy messages

 Serial.println("Xively test");
 Serial.println("==========================");
// Keep trying to initialize the Internet connection
 // Note - we should eventually timeout of this and just run the stairs independently

 Serial.println("Initializing network");
 while (Ethernet.begin(mac) != 1) {
 Serial.println("Error getting IP address via DHCP, trying again...");
 delay(15000);
 }
Serial.println("Network initialized");
 Serial.println();
 // print your local IP address:
 Serial.print("Arduino IP address: ");
 for (byte thisByte = 0; thisByte < 4; thisByte++) {
 // print the value of each byte of the IP address:
 Serial.print(Ethernet.localIP()[thisByte], DEC);
 Serial.print(".");
 }
 Serial.println();
 Serial.println();

} // end of setup function
//////////////////////////// control loop ///////////////////////////
void loop() {
 // main program loop

 ////////////////////////////// Internet sending/receiving code ////////////////////////////////

 if (millis() - lastConnectionTime > connectionInterval) {

 // uncomment this to just send a random value...
 upCount = random(256);

 digitalWrite(ledPin, HIGH ); // turn on transmitter light
 sendData(upCount);
 // read the datastream back from Cosm - comment out to save time
 getData();
 digitalWrite(ledPin, LOW );
 // update connection time so we wait before connecting again
 lastConnectionTime = millis();

 }

 ///////////////////// end of internet send/receive code /////////////////

} // end of main loop code
/////////////////// additional functions //////////////////////////
////////////////////////////////////////////////////////////////////
// send the supplied value to Cosm, printing some debug information as we go
void sendData(int sensorValue) {
 datastreams[0].setFloat(sensorValue);
Serial.print("Read sensor value ");
 Serial.println(datastreams[0].getFloat());
Serial.println("Uploading to Cosm");
 int ret = cosmclient.put(feed, API_KEY);
 Serial.print("PUT return code: ");
 Serial.println(ret);
Serial.println();
}
// get the value of the datastream from Cosm, printing out the value we received
void getData() {
 Serial.println("Reading data from Cosm");
int ret = cosmclient.get(feed, API_KEY);
 Serial.print("GET return code: ");
 Serial.println(ret);
if (ret > 0) {
 Serial.print("Datastream is: ");
 Serial.println(feed[0]);
Serial.print("Sensor value is: ");
 Serial.println(feed[0].getFloat());
 }
Serial.println();
}
contact by Felix Faire
“Turns any hard surface into an interface”
from creativeapplications.net
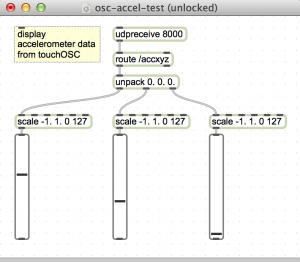
touchOSC accelerometer data in Max
Control Max with your phone
download
https://github.com/tkzic/max-projects
folder: accelerometer-osc
patch: osc-accel-test.maxpat
instructions
- In touchOSC set the ip address of your computer
- In touchOSC send data on port 8000
- In touchOSC options, enable: Accelerometer (/xyz)
- Throw your phone up in the air and watch X,Y, and Z values change in Max.
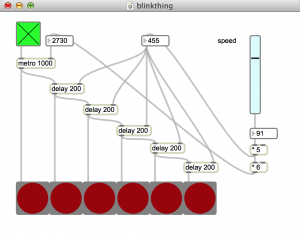
A thing that blinks in Max
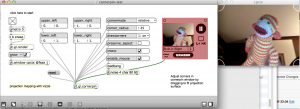
Projection mapping with Vizzie
Video projection mapping using [jit.gl.cornerpin]
download
https://github.com/tkzic/max-projects
folder: vizzie-projection-map
patch: cornerpin-test.maxpat
instructions
- Aim projector at surface.
- Drag the corners of the corner pin window to the corners of the surface.
William J. Turkel
Programmer, teacher, historian, and author of “Spark From The Deep”
library of Max patches
At Github: https://github.com/williamjturkel/Max6
basic Arduino connections to Max
- Dim an LED from Max.
- Read the value of a potentiometer in Max.
download
https://github.com/tkzic/max-projects
folder: arduino-basics
patches:
- arduino-dimmer.maxpat
- arduino-serial-read.maxpat
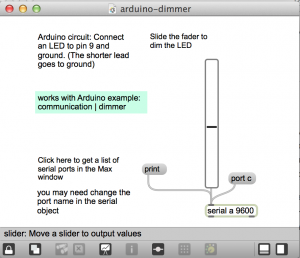
Arduino dimmer
dim an LED from Max
From the Arduino playground
http://playground.arduino.cc//Code/MaxCommunicationExamples
circuit
Connect an LED to pin 9 and ground. The shorter lead goes to ground.
sketch
Load the Arduino example sketch: communications | dimmer
Max
- open arduino-dimmer.maxat
- Click the “print” message to print the list of ports to the Max window. Then set the port in the serial object, using the port message. For example: “port c”.
- Move the slider to dim the LED
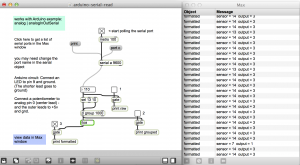
Arduino serial read
Read the value of a potentiometer
This patch is a bit more involved. Refer to the Max Communications Tutorial 2: Serial Communication. In fact, much of this code was lifted from the tutorial.
circuit
- Connect an LED to pin 9 and ground. The shorter lead goes to ground.
- Connect a potentiometer (center lead) to Analog pin 0. The side leads connect to +5v and ground.
sketch
Load the Arduino example sketch: Analog | analogInOutSerial
Max
- Open arduino-serial-read.maxpat
- Click the “print” message to print the list of ports to the Max window. Then set the port in the serial object, using the port message. For example: “port c”.
- Activate toggle to start polling serial port
- Activate toggle number 3 to view formatted output in the Max window
- Turn the potentiometer to send data to Max
general suggestions:
- Try not to get discouraged.
- If weird things happen, close Max, reconnect Arduino, the re-open Max
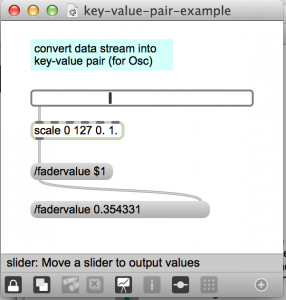
convert data to key-value pair in Max
Something you might use for OSC
download
https://github.com/tkzic/max-projects
folder: key-value-pair
patch: key-value-pair-example.maxpat
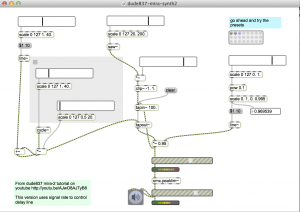
Mira synth in Max
A synthesizer controlled by Mira (iPad)
by dude837, from this video:
download
https://github.com/tkzic/max-projects
folder: mira-synth
patch: dude837-mira-synth2.maxpat
instructions
- Try the presets
- Works with or without Mira
