Bi-directional communication from touchOSC to Arduino using an ethernet shield.
In this version, the Macbook is directly connected to the Arduino to provide a serial monitor for status updates.
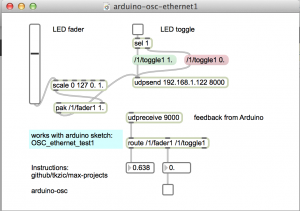
How it works: press a toggle, or move a fader, in touchOSC – it sends a message to the Arduino which lights up, or fades, an LED – then sends back an OSC message to touchOSC to light up the toggle button. (note: local feedback should be off for the toggle button in touchOSC. This is the default)
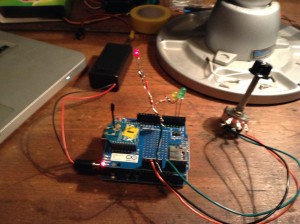
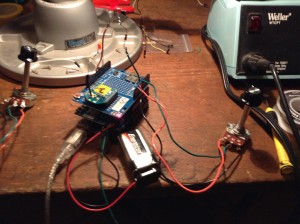
Arduino circuit
- Use an ethernet shield.
- Connect ethernet cable. (I am using a Netgear WNCE2001 ethernet to wiFi adapter)
- LED is connected to pin 5 and ground. The shorter lead connects to ground.
download
https://github.com/tkzic/max-projects
folder: arduino-osc
files
- Arduino sketch: OSC_ethernet_test1/
- touchOSC screen: simple (default) uses /1/fader1 and /1/toggle1
- Max patch: arduino-osc-ethernet1.maxpat
Arduino files and libraries
***update 1/20/2016 there is a new sketch that uses the OSCuino library from CNMAT instead of ardosc. The sketches should be interchangeable. https://github.com/CNMAT/OSC . The sketch is in a folder called: OSCuino_tz and is based on work by Trippylightning at: http://trippylighting.com/teensy-arduino-ect/touchosc-and-arduino-oscuino/
Copy the OSC_ethernet_test1/ folder to Documents/Arduino. This puts it in the Arduino sketchbook.
The sketch uses: #include <ArdOSC.h>
Download ArdOSC from: https://github.com/recotana/ArdOSC
- After downloading, copy the ArdOSC-master folder to /Documents/Arduino/Libraries
- Rename the folder to ArdOSC
This post was the key to figuring out how to make this work: http://arduino.cc/forum/index.php?topic=137549.0
Instructions
- Connect Arduino to Macbook via USB.
- Open the Arduino serial monitor to initialize the ethernet connection and display the IP address.
touchOSC
- In touchOSC or Max, set the target IP to the one just displayed in the Arduino serial monitor
- From touchOSC (or Max) send on port 8000, receive on port 9000.
- Use the default touchOSC layout (simple)
- Use /fader1 and /toggle1 to control the LED
Max
- Open arduino-osc-ethernet1.maxpat
- Set ip address in [udpsend] to the one just displayed in the Arduino serial monitor
- Have some fun
Fixed IP address
update 1/2016: A version of the Arduino sketch that uses a fixed IP instead of DHCP is located in the folder: OSC_ethernet_fixedIP/
The IP is set to 192.168.1.177 but you can change it to any valid address on your network.
Arduino sketch
// generic Arduino OSC program
// works from Max or touchOSC
//
// plug LED into pin 5 (and gnd)
//
// requires ethernet shield
//
// use serial monitor to get the ip address
//
// use these OSC commands (will work from first page of touchOSC simple layout
//
// /1/fader1
// /1/toggle1
//
#include <SPI.h>
#include <Ethernet.h>
#include <ArdOSC.h>
byte mac[] = { 0x90, 0xA2, 0xDA, 0x0D, 0x0B, 0xCE }; //physical mac address
OSCServer server;
OSCClient client;
int serverPort = 8000; //Touch OSC Port (outgoing)
int destPort = 9000; //Touch OSC Port (incoming)
int ledPin = 5;
int flag=0;
void setup(){
pinMode(2, OUTPUT);
 Serial.begin(9600);
 Serial.println("DNS and DHCP-based OSC server");
 // start the Ethernet connection:
 if (Ethernet.begin(mac) == 0) {
 Serial.println("Failed to configure Ethernet using DHCP");
 // no point in carrying on, so do nothing forevermore:
 while(true);
 }
 // print your local IP address:
 Serial.print("Arduino IP address: ");
 for (byte thisByte = 0; thisByte < 4; thisByte++) {
 // print the value of each byte of the IP address:
 Serial.print(Ethernet.localIP()[thisByte], DEC);
 Serial.print(".");
 }
 Serial.println();
 Serial.println();
//start the OSCserver
 server.begin(serverPort);
//add OSC callback function. One function is needed for every TouchOSC interface element that is to send/receive OSC commands.
 server.addCallback("/1/toggle1", &funcOnOff);
 server.addCallback("/1/fader1", &funcFader);
}
void loop(){
if(server.aviableCheck()>0){
 // Serial.println("alive! ");
 }
}
//When the button on the TouchOSC inteface is pressed, a message is sent from the iDevice
//to the Arduino to switch (togle) the LED on the Arduino on/off
//then a messeage is sent bak from the Arduino to the iDevice to toggle the buttom on/off
void funcOnOff(OSCMessage *_mes){
 float value = _mes->getArgFloat(0); //TouchOSC expects float values
//create new osc message
 OSCMessage newMes;
//set destination ip address & port no
 newMes.setAddress(_mes->getIpAddress(),destPort);
 newMes.beginMessage("/1/toggle1");
Serial.println(value);
 if(value < 1.0) {
 digitalWrite(ledPin, LOW);
 }
 else{
 digitalWrite(ledPin, HIGH);
 }
newMes.addArgFloat(value);
//send osc message
 //
 // turn local feedback off on touch-osc control to test this
 client.send(&newMes);
}
// new callback for fader - using same comments
//When the button on the TouchOSC inteface is pressed, a message is sent from the iDevice
//to the Arduino to switch (togle) the LED on the Arduino on/off
//then a messeage is sent bak from the Arduino to the iDevice to toggle the buttom on/off
void funcFader(OSCMessage *_mes){
 float value = _mes->getArgFloat(0); //TouchOSC expects float values
//create new osc message
 OSCMessage newMes;
//set destination ip address & port no
 newMes.setAddress(_mes->getIpAddress(),destPort);
 newMes.beginMessage("/1/fader1");
Serial.println(value);
 int ledValue = value * 255.0;
 analogWrite(ledPin, ledValue);
newMes.addArgFloat(value);
//send osc message
 //
 // turn local feedback off on touch-osc control to test this
 client.send(&newMes);
}

