Syncing visuals to music with Web Audio
by Felix Turner
https://www.airtightinteractive.com/2013/10/making-audio-reactive-visuals/
by Felix Turner
https://www.airtightinteractive.com/2013/10/making-audio-reactive-visuals/
By CICM
The library is also available for Max/MSP: https://cycling74.com/toolbox/hoalibrary-v2-2/#.V6lvoZMrIcg
By Xelnagazchild
by Jerobeam Fenderson
https://github.com/pothosware/SoapySDR/wiki
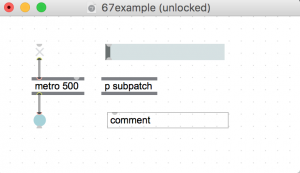
The UI in Max 7 reverses foreground and background from previous versions of Max (and Pd). Additionally, a secondary toolbar menu frames the patcher and all sub-patchers. For example, here is a simple Max 6 patch and its Max 7 equivalent.
Max 6:
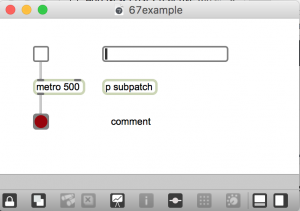
Max 7:
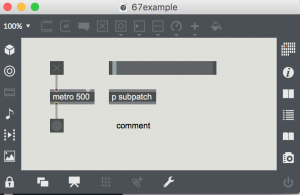
Regardless of which look you find more appealing, the new UI is problematic in several ways.
Max 7 doesn’t include a black-on-white style, but you can make your own. And lose the toolbar. Here is a new and improved version of the patch:
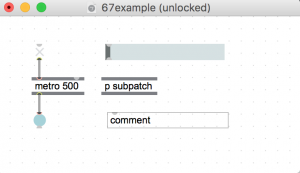
The process is arcane. But it took less than a half hour to get results. Then I wasted time endlessly tweaking.
The secret recipe came from a 2014 Cycling 74 forum post by Phiol, with assistance from Ben Bracken. Everything you need to know is explained in Phiol’s first 2 posts in the thread. https://cycling74.com/forums/topic/custom-color-scheme-layout-setup-walkthrough/#.V6oHMZMrIcg
I encourage you to read both posts and follow the steps precisely. There are no shortcuts. I will paraphrase Phiol’s method here:
And then the bad news:
Then do all the steps mentioned in the previous thread.
-Gradients objects do not work.
For example, [message and umenu] would not keep my custom colors.
Workaround: Once you have started a new patch, reselect your “custom_style” in patch inspector window or the ‘format’ sub menu. That is, click the style that should already be selected/checked – and now it should work.
So yes, for now, as we start a new patch we will we have to make it a habit to always select our “custom_style” in patcher inspector window or the format sub-menu.
![]()
(click the paintbucket icon on the top toolbar)
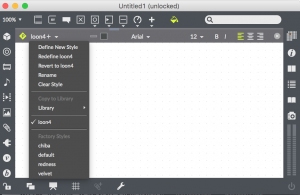
Also, when you open older Max6 patches and/or the help patch and want to apply your new custom style template, make sure that in the “Format” dropdown menu you have selected the “copy style to library”.
Once you’ve done this, you will be able to apply you’re custom style to older/help patchers and resave them with your custom look. To do so, you open Inpector’s Appearance again, and select your “custom_style” that will be in the Library style.
If you are totally confused at this point, so was I.
Starting with step one above, make a patch with common objects, that looks something like this:
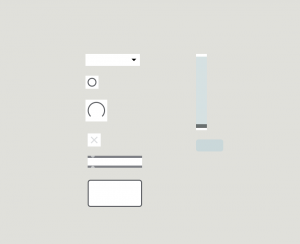
Select each object individually, then with inspector, change the background color to white, or a lighter shade, and the text color to black.
You may need to experiment. Try with a small number of objects at first – because you will probably need to do the whole process several times. As noted above, you have start from the begining each time by hand. You can’t modify a style after you save it.
Then, you should be able to follow the rest of the steps from Phiol’s post.
The objects used for this style are:
*these objects use gradients
The procedure is basically the same as setting the white background.
Note: you can toggle the toolbar anytime with <cmd>8
If you create a subpatch and it reverts back to the default style then…
Check out the Cycling 74 vignettes about styles and templates to get a better understanding of what’s going on here:
By Christopher Konopka
In the past year, Chris has published nearly 2500 improvised video pieces.
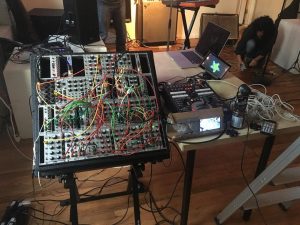
You may be familiar with analog modular audio synthesis. The hardware to produce video looks nearly identical – a maze of patch cords and dials.
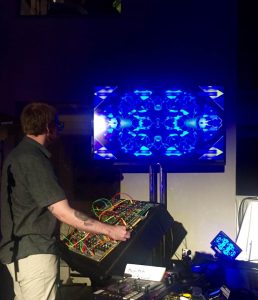
Analog video is television. A CRT (cathode ray tube) resynthesizes video information by demodulating signals from a camera. Vintage televisions have dials to adjust color and vertical sync. When you turn the dials you are synthesizing analog video. Distortion, filtering, and feedback – either at the source (camera) or the destination (tv screen) – offer up an infinite variety of images.
Today all media is digital. Like the screen you are looking at. The difference with analog is in how it’s produced. Boundaries are less definite. Lines curve. Colors waver. Feedback looks like flames. Every frame is a painting.
https://vimeo.com/172035463
Images can be generated electronically using modules – without a camera.
Like with audio sampling, anything is a source. Movies, Youtube, live television, even Felix the Cat.
https://vimeopro.com/cskonopka/analogvideo-december-2015/video/153312961
When you aim a guitar at an amplifier it screams. Tilt it away slightly and the screaming subsides. In between there’s sweet spot. The same is true with cameras and screens. Feedback results when output is mixed with input.
https://vimeopro.com/cskonopka/analogvideo-december-2015/video/153306760
Analog shortwave radio signals are distorted by the atmosphere in a manner similar to video filtering.
A studio in Bethel, Maine.

An improvised collaboration between Chris and Tom Zicarelli using shortwave radio processed with audio effects.
https://www.instagram.com/p/BImQwOGBveV/?taken-by=cskonopka
A recent screen test at the Gem Theatre in Bethel, Maine. Source material is a time lapse film of a glacier installation – produced at the same theatre – by Wade Kavanaugh and Steven Nguyen. https://www.youtube.com/watch?v=6c36Y-Dcj30 The film was re-synthesized using analog video and feedback. Soundtrack by Tom Zicarelli.
https://www.instagram.com/p/BImRSzHBOLL/?taken-by=cskonopka
Big screen equals mind bending experience.
Note: previous clip excerpted from this 15 minute jam: https://vimeo.com/177843310
The patterns in this clip appear to be three dimensional. They are not.
From a show that happened somewhere in the known universe:
Improvised analog video with the band “Alto”. Patterns reminiscent of magical textiles.
http://www.w6kan.com/k3mrg2.html
http://iacantennas.com/docs/Double-Bazooka-Phased-Array.pdf
http://www.sage-american.com/SK/cebik/a10/scv/bc40ab.html
http://ac0c.com/attachments/40m_parasitic_to_phased.pdf
http://www.iw5edi.com/wp-content/uploads/2013/06/40-Meter-Mini-MOXON-Beam-Antenna.pdf
http://www.moxonantennaproject.com/IK0GDH/IK0GDH.htm
http://www.optibeam.info/index.php?article_id=85&clang=1
http://n4jte.blogspot.com/2006/10/2-element-40-meter-reversable-quad.html
http://www.hamuniverse.com/na4lquagibeam.html
https://www.dxengineering.com/parts/csh-d4
http://www.jkantennas.com/jk403.html
http://www.rssl.lk/40-meters-3-element-wire-yagi-by-ve3vn/
http://amfone.net/Amforum/index.php?topic=19385.0
http://lists.contesting.com/_towertalk/1997-12/msg00178.html
http://ve3vn.blogspot.it/2014/05/40-meters-3-element-wire-yagi.html
http://ve3vn.blogspot.it/2014/12/40-meters-4-element-wire-yagi.html
http://lists.contesting.com/_towertalk/1998-05/msg00610.html
http://egpreston.com/40mbeam.txt
http://www.dxzone.com/catalog/Antennas/40M/40_meter_Yagi_Antennas/
(3-6-9) http://radio.n0gw.net/radio05.pdf
By Martin Treiber
by Jim Lux, w6rmk