update 6/2014: Internet Sensors projects: https://reactivemusic.net/?p=5859
original post
http://zerokidz.com/internetMax.pdf

update 6/2014: Internet Sensors projects: https://reactivemusic.net/?p=5859
original post
http://zerokidz.com/internetMax.pdf
update 6/2014: latest version of MaxSDR offers FCD pro+ drivers: http://zerokidz.com/radio
original post
A fork of the David Pella code which was the basis for the MaxSDR project externals. It seems plausible that we could modify the drivers and get MaxSDR working with the funCube pro+.
By Alex Csete, OZ9AEC
http://www.oz9aec.net/index.php/funcube-dongle/479-the-funcube-dongle-propro-on-the-raspberry-pi

In this patch, Max uses the Soundcloud API to find available tracks for a user and then stream or download one of the tracks.
The Soundcloud API reference provides examples using curl.
http://developers.soundcloud.com/docs/api/reference
https://github.com/tkzic/internet-sensors
folder: soundcloud
By Ray Viljoen
https://github.com/RayViljoen/Raspberry-PI-SD-Installer-OS-X

Make sure the SD card is unlocked. It takes 5-10 minutes to copy a 4Gb card.
local downloaded files are in tkzic/rpi
Notes from Gould Academy 2013.
For construction details of the final project see: https://reactivemusic.net/?p=12300
original post
An attempt to collect notes on this project as we bring it to a close.
During Monday’s class I gave students the current version of the Arduino sketch – and showed them how to hack the code which triggers Midi notes. it was amazing to see them make changes to the code, which they barely understood – and then upload their changes into the Arduino to see how it affected the sound of the stairs.
There are two sets of stairs:
Here are relevant posts – until the student portfolio presentations begin…
Logging data to Pachube
https://reactivemusic.net/?p=4900
https://reactivemusic.net/?p=5163
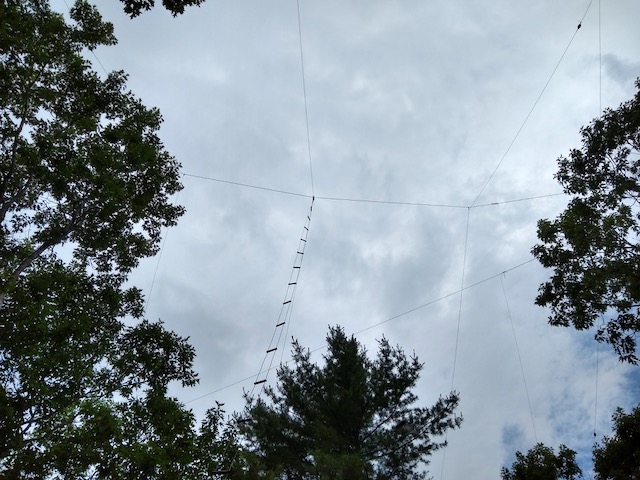
Arduino IR beam testing
A variation on the Midi synthesizer from this post: https://reactivemusic.net/?p=4960
The synthesizer was built in PureData (Pd extended) using the visual interface on a MacBook. Then the pd file was run in command line mode on the r-pi. The sound card is a Griffin i-Mic, running at 22.5 Khz sample rate. Although there’s no reason why you couldn’t use the builtin DAC on the r-pi.
The r-pi is connected via the ethernet port to a wi-fi network which receives Osc (Open Sound Control) messages from an iPod running touch-Osc. The network connection could have been made using a USB wifi adapter.
All together the cost of this arrangement (less the iPod) would be less than $50. The software is all open source. The huge financial barriers to working with music synthesis and signal processing, that have been associated with these fields for years, simply don’t exist anymore.
Alternative ways of controlling the synth – if a wiFi router is not available, include:

Notes:
Pd file: tkzic/rpi/pd/piSynth1_OSC.pd
recieve port is 8000 – and it uses page 1 of the simple touchOSC template
pd-extended -nogui -noadc piSynth1_Osc.pd
Note: there is some special code to prevent seg faults when you go from page 2 to page 1 of the touchOSC template
Here’s a great tutorial on using OSC with Pure Data
http://en.flossmanuals.net/pure-data/network-data/osc/
Successfully installed this GPS board on the R-Pi.
By Kevin Townsend at adafruit.com
http://learn.adafruit.com/adafruit-ultimate-gps-on-the-raspberry-pi/introduction
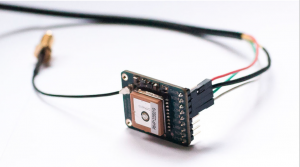
The drivers for the console cable were already in the Raspian distribution on the R-Pi.
I installed the gpsd (daemon) software as directed in the above tutorial.
Documentation for gpsd is here:
http://gpsd.berlios.de/client-howto.html
Sample C code is: gpxlogger.c and cgps.c – which can be found in tkzic/rpi/gpsd 3.7/
(todo – write sample code and add to telemetry tracker)
Chord generator and collaboration tool
by Henrik Schwarz at Ableton
https://www.ableton.com/en/packs/schwarzonator/
